
This tutorial focuses on setting up and configuring a SSH server on a Ubuntu 20.04 desktop environment.
As a system administrator, you are probably working with SSH on a regular basis.
Short for Secure Shell, SSH is a network protocol used in order to operate remote logins and commands on machines over local or remote networks.
SSH comes as an evolution to the Telnet protocol : as its name describes it, SSH is secure and encrypts data that is transmitted over the network.
As a power user, you may want to onboard new machines with SSH servers in order to connect to them later on.
In this tutorial, we are going to see how you can install and enable SSH on Ubuntu 20.04 distributions.
We are also going to see how you can install OpenSSH on your fresh Ubuntu distribution.
Prerequisites
In order to install a SSH server on Ubuntu 20.04, you need to have sudo privileges on your server.
Note : there are no practical differences between adding a user to sudoers on Ubuntu and Debian.
To check whether you have sudo privileges or not, you can launch the following command.
sudo -lIf you see the following lines on your terminal, it means that you currently belongs to the sudo group.
User user may run the following commands on server-ubuntu:
    (ALL : ALL) ALL
Alternatively, you can run the “groups” command and verify that “sudo” is one of the entries.
groups
By default, SSH should already be installed on your host, even for minimal configurations.
To check that this is actually the case, you can run the “ssh” command with the “-V” option.
ssh -V
As you can see, I am currently running OpenSSH 8.2 on Ubuntu with the OpenSSL 1.1.1 version (dated from the 31th of March 2020).
Be careful : this information does not mean that you have a SSH server running on your server, it only means that you are currently able to connect as a client to SSH servers.
Now that all prerequisites are met, let’s see how you can install an OpenSSH server on your host.
Installing OpenSSH Server on Ubuntu 20.04
First of all, as always, make sure that your current packages are up to date for security purposes.
sudo apt-get update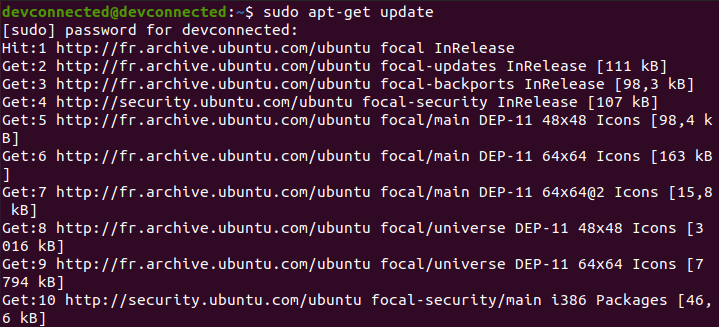
Now that all packages are up-to-date, run the “apt-get install” command in order to install OpenSSH.
sudo apt-get install openssh-serverThis command should run a complete installation of an OpenSSH server.
From steps displayed on your console, you should see the following details :
- A configuration file is created in the /etc/ssh folder named sshd_config;
- Symbolic links are created : one named sshd.service (your systemd service) and one in the multi-user target (to boot SSH when you log in).
As stated earlier, a SSH service was created and you can check that it is actually up and running.
sudo systemctl status sshd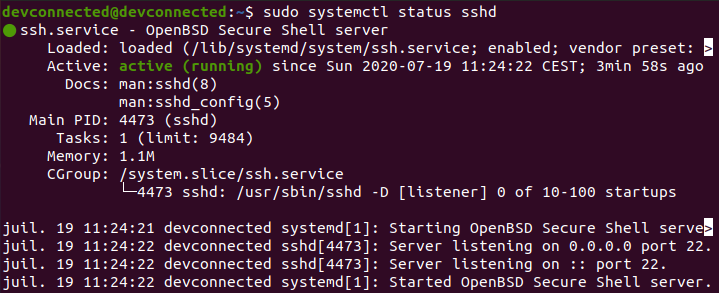
By default, your SSH server is listening on port 22 (which is the default SSH port).
If you want to go into further details, you can actually check that the SSH server is listening on port 22 with the netstat command.
netstat -tulpn | grep 22^

(if you don't have netstat by default)
sudo apt-get install net-tools 
Awesome!
Your SSH server is now up and running on your Ubuntu 20.04 host.
Enabling SSH traffic on your firewall settings
If you are using UFW as a default firewall on your Ubuntu 20.04 host, it is likely that you need to allow SSH connections on your host.
To enable SSH connections on your host, run the following command
sudo ufw allow ssh
If you are not sure if you are actively using the UFW firewall, you can run the “ufw status” command.
sudo ufw status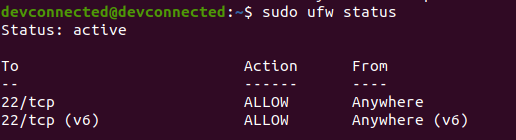
Enable SSH server on system boot
As you probably saw, your SSH server is now running as a service on your host.
It is also very likely that it is instructed to start at boot time.
To check whether your service is enable or not, you can run the following command
sudo systemctl list-unit-files | grep enabled | grep sshIf you have no results on your terminal, you should “enable” the service in order for it to be launched at boot time.
sudo systemctl enable sshImportant note : this is not a typo, we are actually enabling the SSH service even if we are referring to the sshd service.

If you look for the sshd.service file, you will actually realize that this is a linked unit file.

As a consequence, you can’t directly enable the sshd service, but you have to enable the ssh one.
Configuring your SSH server on Ubuntu 20.04
Before giving any access to your users, it is important for your SSH server to be correctly configured.
If it is done badly, you are at risk when it comes to SSH attackes and your entire infrastructure can be compromised easily.
By default, SSH configuration files are located in the /etc/ssh folder.
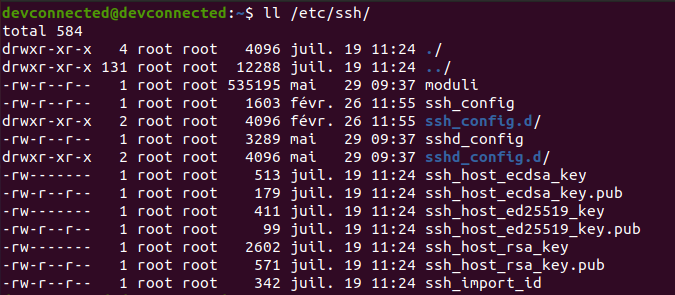
In this directory, you are going to find many different files and folders, but the most important ones are :
- ssh_config : is used in order to configure SSH clients. It means that it defines rules that are applied everytime you use SSH to connect to a remote host or to transfer files between hosts;
- sshd_config : is used in order to configure your SSH server. It is used for example to define the reachable SSH port or to deny specific users from communicating with your server.
In this tutorial, we are going to focus on the server part of the configuration, but you can tell a look at the other files if you are curious about them.
Changing SSH default port
The first step towards running a secure SSH server is to change the default assigned by the OpenSSH server.
Edit your sshd_config configuration file and look for the following line.
#Port 22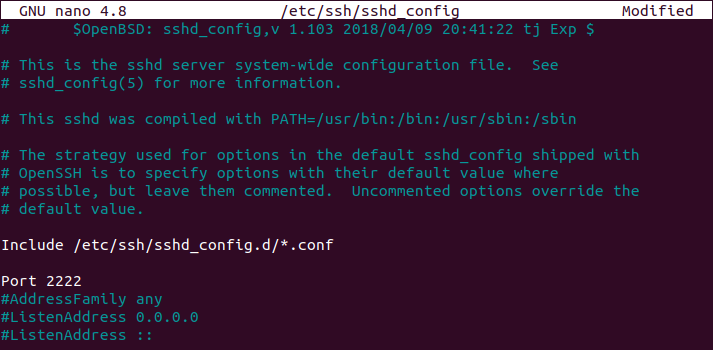
Make sure to change your port to one that is not reserved for other protocols. I will choose 2222 in this case.
Be careful when you change your default SSH port, you will have to specify it when connecting to it.
Disabling Root Login on your SSH server
By default, on recent distributions, root login is set to “prohibit-password”.
This option means that all interactive authentication methods are banned, allowing only public keys to be used.
In short, you need to setup SSH keys and to use them in order to connect as root.
However, even if we connect without a password, root login is not recommended : if keys are compromised, your entire host is compromised.
As a consequence, you can set this option to “no” in order to restrict it completely.
#PermitRootLogin

PermitRootLogin no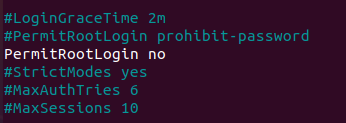
Restarting your SSH server to apply changes
In order for the changes to be applied, you need to restart your SSH server.
sudo systemctl restart sshd

sudo systemctl status sshd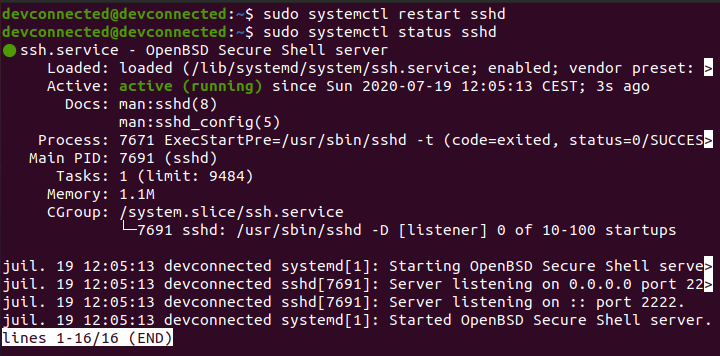
When restarting it, make sure that the server is correctly listening on the custom port your specified earlier.
This information is available on the last lines of the systemd status command.
You can also use the “netstat” command as we already did in the previous sections.
netstat -tulpn | grep 2222Connecting to your SSH server
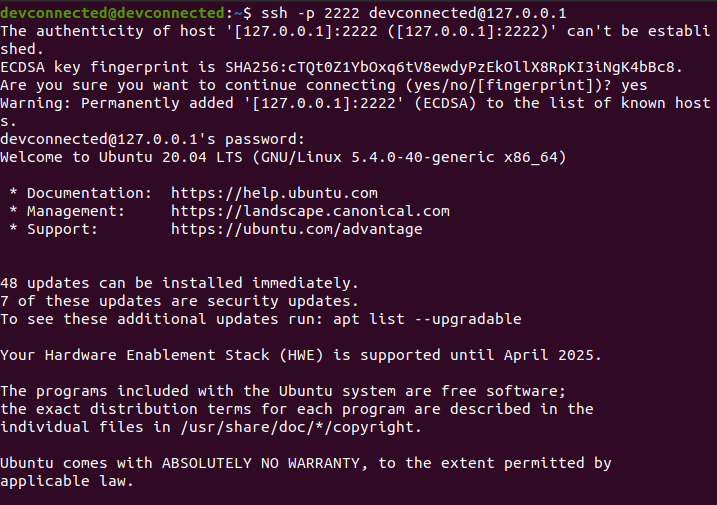
In order to connect to your SSH server, you are going to use the ssh command with the following syntax
$ ssh -p <port> <username>@<ip_address>If you are connecting over a LAN network, make sure to get the local IP address of your machine with the following command
$ sudo ifconfig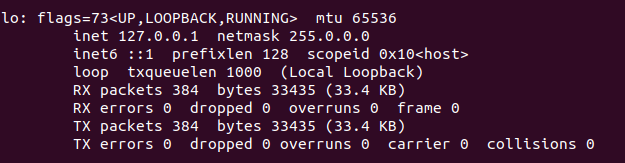
For example, in order to connect to my own instance located at 127.0.0.1, I would run the following command
$ ssh -p 2222 <user>@127.0.0.1You will be asked to provide your password and to certify that the authenticity of the server is correct.
Exiting your SSH server
In order to exit from your SSH server on Ubuntu 20.04, you can hit Ctrl + D or type ‘logout’ and your connection will be terminated.

Disabling your SSH server
In order to disable your SSH server on Ubuntu 20.04, run the following command
sudo systemctl stop sshd

sudo systemctl status sshd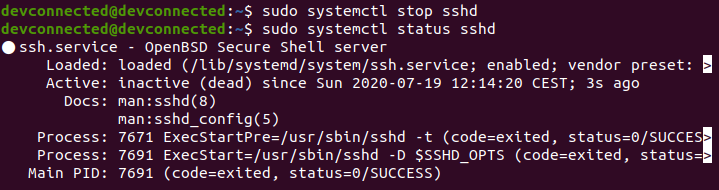
From there, your SSH server won’t be accessible anymore.
Conclusion
In this tutorial, you learnt how you can install, enable, configure and restart your SSH server on Ubuntu 20.04
With this tutorial, you also learnt how you can configure your SSH server in order for it to be robust enough for basic attacks.
If you are interested in Linux system administration, we encourage you to have a look at our other tutorials on the subject.

12 comments
[…] How To Install and Enable SSH Server on Ubuntu 20.04 […]
Good guide 🙂
Still can’t connect. Hangs here:
debug1: Local version string SSH-2.0-OpenSSH_8.2p1 Ubuntu-4ubuntu0.1
Great write-up and super useful – thanks!
please add port 2222 to firewall to allow a connection through new port
Thanks, worked on the first try.
Great guide!
What are the changes required (in the above tutorial) if I already have a VPN setup in my home network?
Thanks. Could you add how to setup keys?
Nice tutorial! Great work!
Thank you the guide was very userful.
Thank you, it was easy to follow