When using Git, it is quite common for developers to add new files to their repositories during development.
Most of the time, files are associated with commits. Developers often start by adding files to their staging area just before committing them to the Git repository.
However, in some cases, you may want to undo a “git add” operation that you just performed.
Maybe you added too many files to your staging area or you may feel that a file needs more work because committing it to the repository.
In this tutorial, you will learn how you can simply undo a Git add operation that you just did.
Using those methods, files will be back to your working directory.
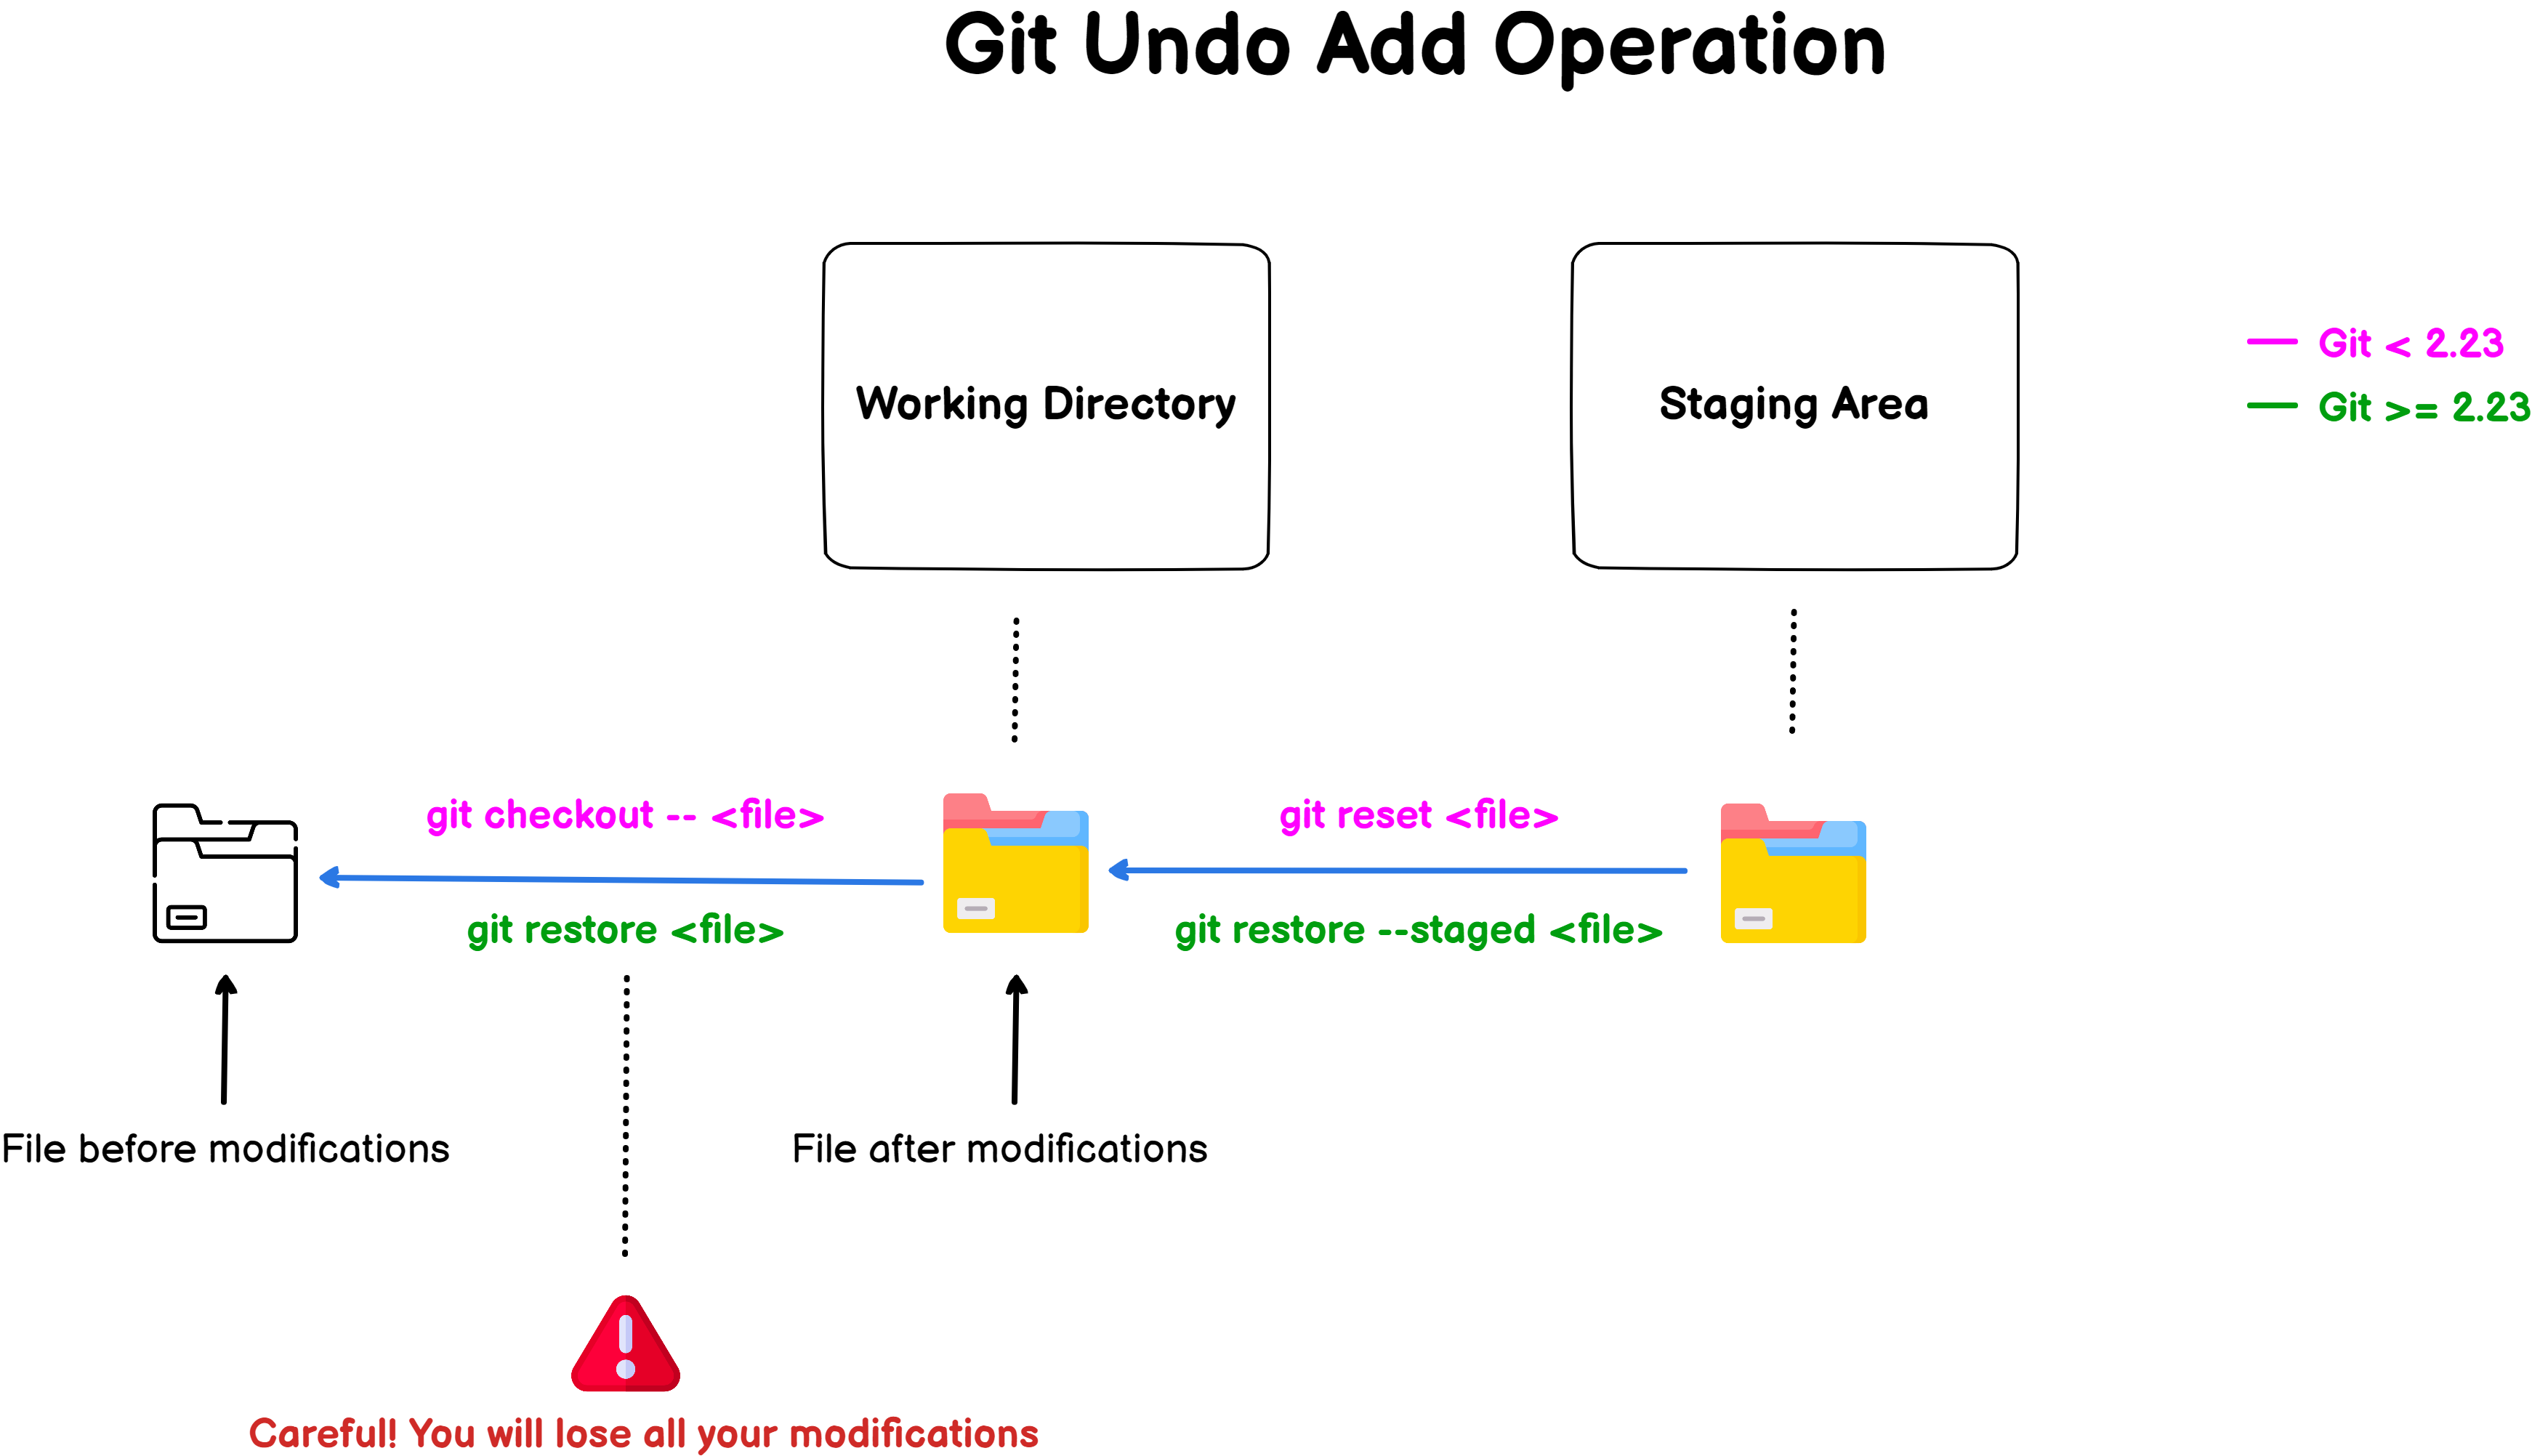
As a picture is worth a thousand words, here is a recap of all the operations that you can performed to undo a Git add operation.
If you want to have more details, you can read the detailed examples below.
Determine your current Git version
As any other software tools, Git changes and adds new commands on major releases.
As a consequence, if you are using an old version of Git, you might not be able to run some of the commands.
In order to know your current Git version, you can execute the “git” command followed by the “–version” option.
$ git --version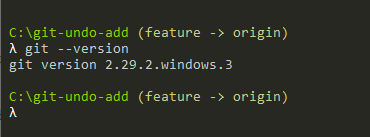
The “git restore” command was introduced in Git 2.23, so if you are using an older version, make sure to update your current Git installation.
$ git update

$ git update-git-for-windows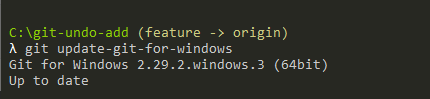
Undo Git Add using restore
The easiest way to undo your git add command is to use the “git restore” command with the “–staged” option and specify the file you want to unadd.
$ git restore --staged <file>As an example, let’s say that you are on a branch named “feature” and that you have recently added a new file to your staging area.
$ git status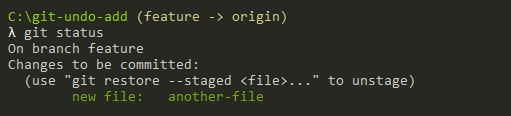
In order to bring back the file to the working directory, we can execute the “git restore” command with the “–staged” option.
$ git restore --staged another-file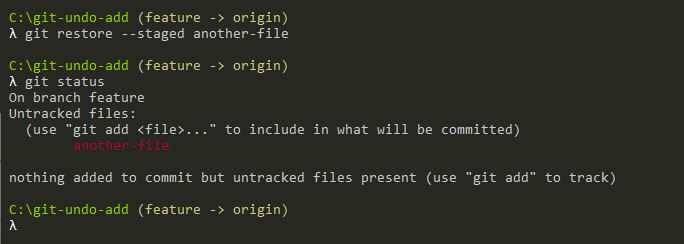
Congratulations, you have successfully undone your “git add” command using the restore one!
Now you can modify your file, add it again and commit it if you want.
The “–staged” option means that you essentially want to unstage the file from your Git index, but that you want to keep the modifications done to the file.
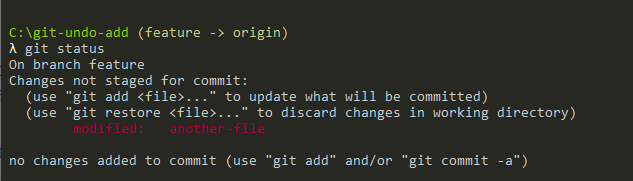
So what happens if you don’t specify the “–staged” option?
As specified in the “git restore” documentation, by default, the working tree will be restored, meaning that you are discard changes from your working area.
Note that the file needs to be tracked by Git in order to be restored : if it is part of the untracked files, you won’t be able to “restore” it.
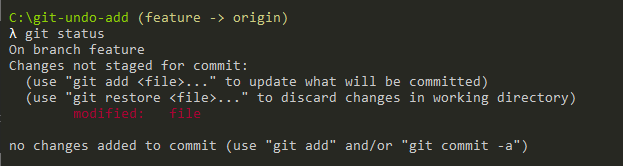
As an example, let’s say that you have modified a file but the changes are yet to be committed to the staging area.
Note : be extra careful with the “git restore” command when files are in your working directory, you will lose all your changes and there is no going back.
$ git restore another-file

$ git status
On branch feature
nothing to commit, working tree clean
Awesome, your file went back to the state it was before doing any modifications to it.
Undo Git Add using reset
Undoing a recent Git “add” operation can also be achieved by using the “git reset” command followed by the file that you want to “unstage“.
$ git reset <file>

$ git reset -- <file>                    (is an equivalent syntax)

$ git reset HEAD <file>                  (achieves the same result)
As an example, let’s try to undo a Git “add” operation on a file named “file” that we just added.

In this case, to undo this accidental Git “add” operation, we are going to use the “git reset” command, specify the HEAD (the most recent commit) and the name of the file.
$ git reset HEAD file

Unstaged changes after reset:
M       file
As you can see, our files were correctly unstaged which is the result that we wanted to achieve.
A simple “git status” command can be used in order to verify our current state.
Congratulations, you have successfully undone an “add” operation in your repository!
Erasing your local changes using git checkout
Now that your file is back to your working directory, you can choose to erase all the modifications that you have performed.
To undo all local changes and go back to your file original version, you have to use the “git checkout” command followed by double hyphens and the name of the file.
$ git checkout -- <file>As an example, let’s use the file that we unstaged in the previous section.
If we want to remove the modifications done to this file, we execute the command described just above.
$ git checkout -- file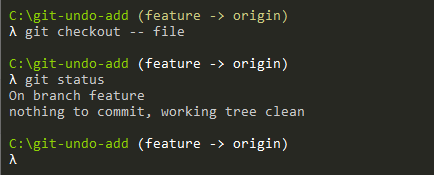
As you can see, all modifications were “erased” and the file is back to its original state.
Conclusion
In this tutorial, you learnt how you can easily “undo” a Git “add” operation. Depending on your Git version, you can use two commands : the “restore” one or the “reset” one.
Additional options have to be used depending on the location of your file : “–staged” if it is in the staging area or no options if it is in your working directory.
If you are interested in Software Engineering, we have a complete section dedicated to it on the website, so make sure to check it out!