
When working on Linux operating systems, knowing how to get your IP address is essential.
Getting your IP address is often the first step of most network troubleshooting processes.
If you are trying to reach a website but the website is no answering back, it might be because your network adapter is badly configured.
Similarly, you might want to reach internal addresses, but if your IP address is configured in the wrong subnet, you won’t be able to ping them.
In this tutorial, we are going to see how you can get your IP address on Linux easily.
We are also going to explain the difference between private IP addresses and public IP addresses.
Find your private IP on Linux
The easiest way to get your private IP address on Linux is to use the “ip” command with the “a” option for “address”.
$ ip a

$ ip address
When running the “ip” command, you will be presented with all the network interfaces available on your host.
In this case, the server has two network interfaces : the loopback address (or localhost) and the “enp0s3” interface.
For this network interface, you are presented with multiple information :
- Network adapter general information : its state (up or down), its MTU as well as the qlen for the Etherner buffer queue;
- Layer 2 information : in this case, you are running on the Ethernet protocol with a given MAC address and a broadcast address;
- Layer 3 information : what you are probably interested in which is your IPv4 address in CIDR notation, the subnet broadcast address as well as the address lifetime (valid_lft and preferred_lft)
- IPv6 addresses : this section might not appear in your network adapter configuration as not all interfaces are running IPv6 addresses. If this is the case, it will appear here.
Find IP Address using hostname
The “hostname” command is quite popular on Linux operating systems and it is used in order to get and set the hostname of a server.
In order to find your private IP address, use the “hostname” command with the “-I” option for IP address. Note that multiple IP addresses will be shown if you own IPv4 and IPv6 addresses on the same interface.
$ hostname -IAs you can see, in this case, my network adapter owns two different IP addresses :
- 192.168.178.30 : which is a private IP address of the local subnet (192.168.178.0)
However, in this case, you are presented with the subnet mask which is not very handy if you are looking to allocate an IP to a new host on this subnet.
Find Subnet Mask using ifconfig
In order to use the ifconfig command, you need to have the “net-tools” package installed on your host.
In order to install the “net-tools”, simply run the “apt-get install” command with the “net-tools” package. You will need to have sudo rights to install packages on your system.
$ sudo apt-get install net-toolsIn order to find the subnet mask for your host, use the “ifconfig” command with the interface name and pipe it with the “grep” command to isolate the “mask” string.
$ sudo ifconfig | grep -i mask
In this case, you are presented with subnet masks for every network interface (loopback interface included).
Note that you are also provided with the broadcast address if applicable.
Get your private IP address on Desktop
In some cases, you might find handy to find your private IP address by navigating the menus provided by your desktop environment.
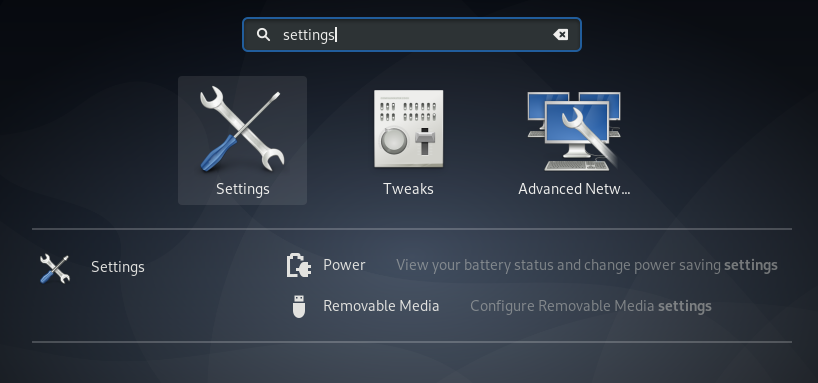
- To get your private IP address, open the “Settings” utility by browsing the “Activities” menu at the top left corner of your screen.
- Now that the “Settings” are open, find the “Network” section and click on the cog-wheel located at the right of your default network adapter.
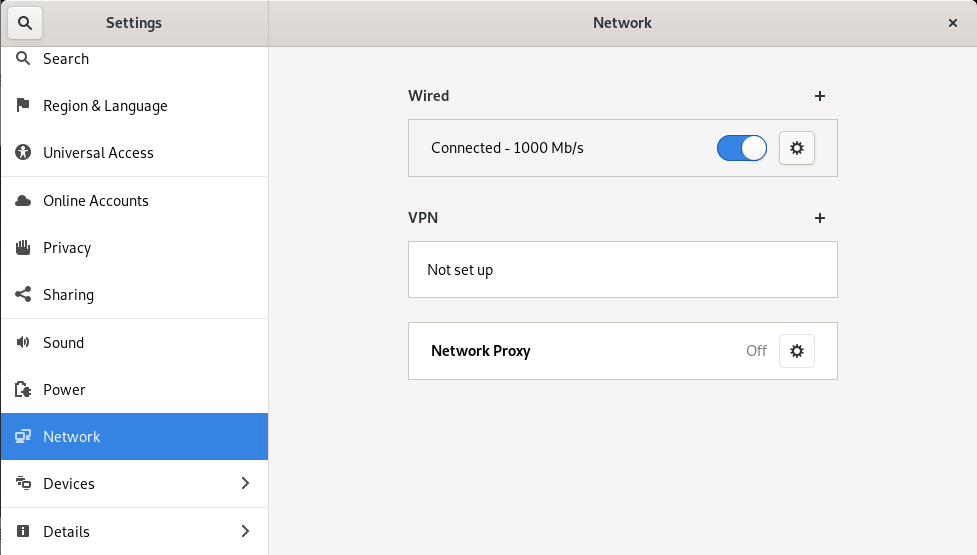
- In the settings of your default network adapter, you will be provided with your different IP addresses, as well as your hardware address (or MAC address) and your default DNS address.
Awesome, you have successfully found your private IP address using the desktop environment (in this case, GNOME)
Find Default Gateway IP Address
In some cases, you are not interested in your own IP address but in the IP address of the gateway.
In order to find the IP address of your default gateway, use the “ip” command with the “r” option for “route”. You can use the “grep” command in order to isolate the “default” string which is the default gateway.
$ ip r | grep default

$ ip route | grep default
In this case, you are interested in the line with a “default” option which is the route taken for packets sent over the network by default.
Private and Public IP Addresses
In the previous sections, we have seen how you can easily have your IP address using several commands.
However, those commands were used to determine your private IP address, not your public one.
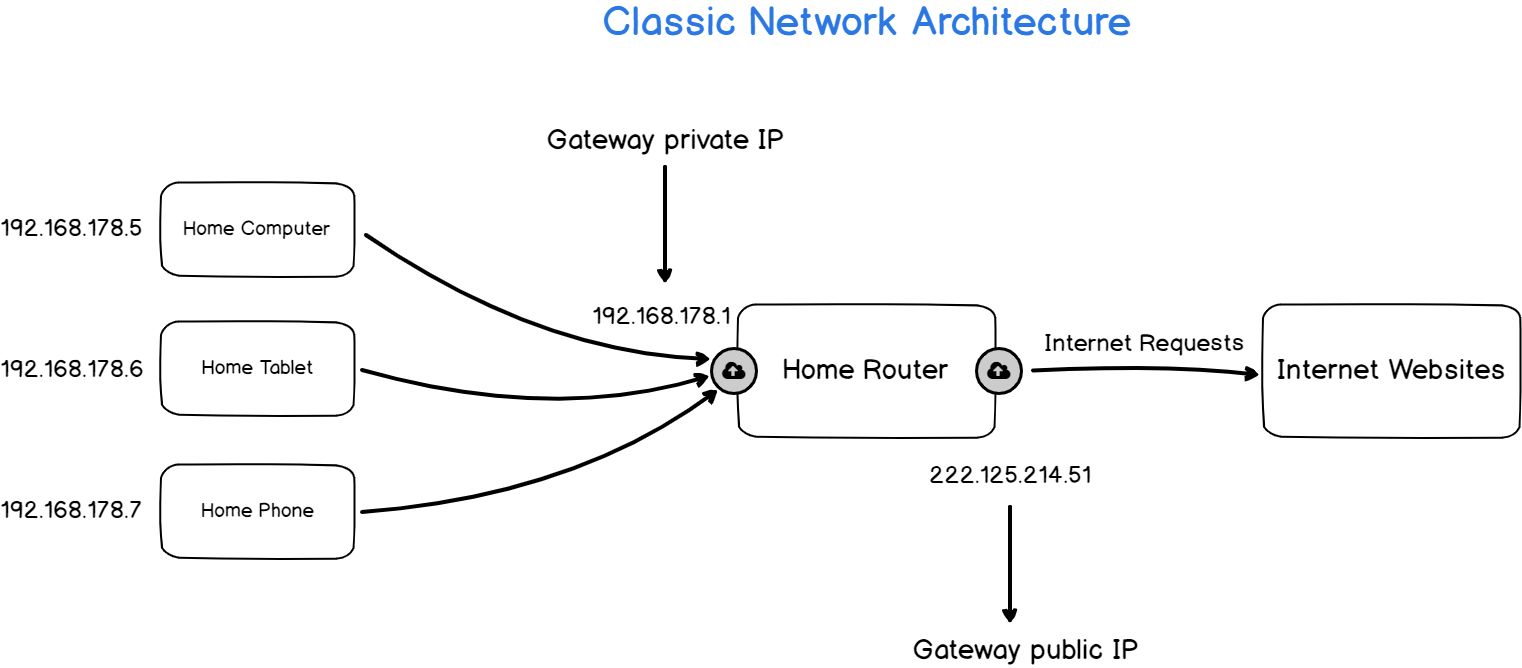
So what’s the difference between your private IP address and your public IP address?
In short, the private IP address is used on your specific private subnet, most of the time at home on a LAN network.
When you are trying to reach websites outside of your home network, you are using a public IP address that is assigned by your Internet Service Provider (or ISP).
As a consequence, you are not able to directly get your public IP address because it will be assigned to the network adapter of your default gateway (which is a router at home).
To get your public IP address, you will need to ask an external service unless you are able to connect to your router directly.
Find Public IP Address on Linux
The first method to find your public IP address on Linux is to use a external HTTP services.
Those HTTP services are programmed to send back the IP that made the request in the first place, which is your default public IP address.
In order to get your public IP address on Linux, use the “curl” command and add one of the following websites as a parameter :
- ifconfig.io
- ifconfig.co
$ curl http://ifconfig.io

222.265.124.60
Awesome, you have successfully identified your public IP address using a external third-party service.
Find Public IP Address using dig
The other way to get your public IP address on Linux is to use the “dig” utility.
The “dig” utility might not come directly with your distribution. If you do not own “dig”, you can install it by installing the “dnsutils” package on your machine.
$ sudo apt-get install dnsutilsNote : you need to have sudo privileges in order to install new packages on your machine.
Now that “dig” is correctly installed, you can perform a DNS query in order to get your public IP address.
To get your public IP address, use the “dig” command and specify specific DNS servers that are programmed in order to answer your own IP address back (in this case, Google DNS servers)
$ dig TXT +short o-o.myaddr.l.google.com @ns1.google.com

"222.265.124.60"
Great, you have successfully identified your public IP address on Linux!
Conclusion
In this article, you learnt how you can easily get your private IP address using command-line utilities already installed on your computer.
You have learnt about the difference between private IP addresses and public IP addresses and you have used external third-party utilities in order to identify your public IP address.
If you are interested in Linux System Administration, we have a complete section dedicated to this subject, so make sure to check it out!

4 comments
[…] How To Get Your IP Address on Linux […]
[…] Note : you can follow this tutorial if you are not sure how you can find your IP address on Linux. […]
[…] : if you are not sure about the way of finding your IP address on Linux, we have a complete guide on the […]
Thank You very very much. this article is really saved me 1 day to solve out Internet issue in the server for Virtulization related.
This saves much our time to find out multiple issues and worked well. 🙂