
As a network administrator, you are probably already very familiar with the ARP protocol.
ARP is commonly used by layer two devices in order to discover as well as communicating with each other easily.
When you are dealing with a small office network, you might be tempted to ping hosts in order to verify that they are available.
If you are using the ICMP protocol, you might be aware that you are actually performing ARP requests in order to probe devices on your network.
If you are looking for a more straightforward way to create ARP pings, you might be interested in the arping command.
In this tutorial, we are going to focus on the arping command : how to install it and how to use it effectively.
Prerequisites
In order to install the arping command on your system, you will obviously need sudo privileges on your server.
In order to check if you are sudo or not, you can simply execute the following command
$ groups

user sudo
If this is not the case, you can read our guide on getting sudo privileges for Debian or CentOS hosts.
Installing arping on Linux
In order to install the arping command on your server, execute the “apt-get install” command and specify the “arping” package.
$ sudo apt-get install arping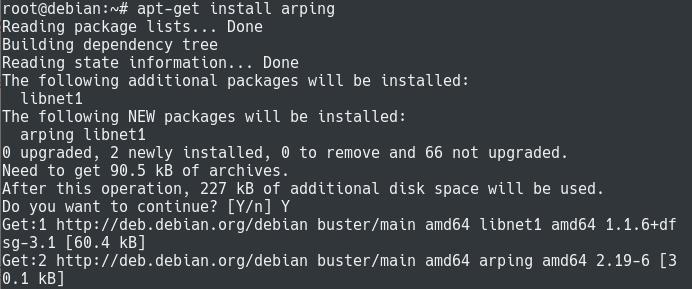
Now that the command is installed, you can execute the “arping” command in order to check the current version used.
$ arping -v

ARPing 2.19, by Thomas Habets <[email protected]>
Great!
The arping command is now installed on your server.
By default, the arping command is going to send an ARP (or ICMP) request every second, but it can obviously be configured.
Using arping to discover hosts
First of all, as any device communicating over Ethernet, your device has an internal ARP table used to communicate over the network.
In order to see your current ARP entries, you can simply execute the “arp” command with the “-a” option for all devices.
$ arp -aWhen using the ARP command, you are presented with a list of hostnames, followed by IPs and MAC addresses.

In this case, I am presented with the only entry in my ARP table : a router accessible via the 192.168.178.1 IP address.
However, I might be interested in finding other hosts on my local network : to achieve that, you are going to use the arping command.
Pinging hosts using IP addresses
In order to ping hosts over your network, you can simply use the “arping” command and specify the IP address to be pinged.
Additionally, you can specify the number of pings to be sent using the “-c” option for “count”.
$ arping -c 2 <ip_address> Note : if you are not sure about the way of finding your IP address on Linux, we have a complete guide on the subject.
For example, using the “192.168.178.27” IP address over your local network, you would execute the following command
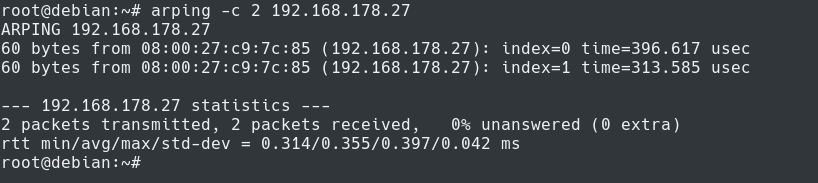
As you can see, if you are getting response pings, you are presented with the MAC address of the corresponding device.
Note that using the arping command will not automatically update your ARP table : you would have to use a command such as ping in order to update it.
$ arp -a
Awesome, you successfully used the arping command in order to issue ARP requests over the network!
ARP timeouts using arping
If the arping command is not able to resolve the IP address of the target defined, you will get an ARP timeout.
As an example, executing an ARP request on an unknown host would give you the following output
$ arping -c 5 <ip_address>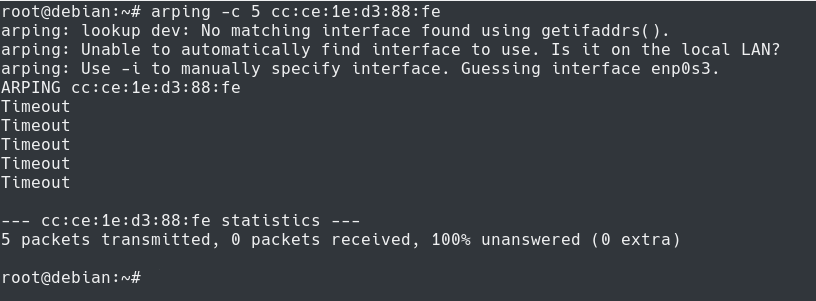
As you can see, in some cases, you will be presented with a warning if you don’t specify any network interface.
This is quite normal because the arping command expects a network interface to be specified.
If you were to deal with a router, or if you chose to install your Linux server as a router, two network interface cards can be installed in order to route to two different networks.
If this is the case, the arping needs to know the network interface it needs to use in order to send the ARP ping.
As you can see, the arping command will try to “guess” the network interface if it is not provided with one.
Specifying the network interface
If you have multiple network interfaces on your server, the arping won’t be able to “guess” the network interface card to be used.
As a consequence, you might get an error message stating that the arping was not able to guess the correct one.

In order to specify the network interface to be used, you will have to use the “-I” option followed by the name of the network interface.
If you need some help on how to enumerate network interfaces, you can use this guide on finding your IP address on Linux.
$ arping -I <interface_name> <ip_address> If our interface is named “enp0s3”, the command would be the following one :
$ arping -I enp0s3 192.168.178.22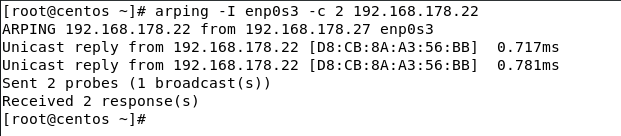
Awesome, you have pinged your distant server and you have specified the network interface to be used!
Sending ARP pings from Source MAC
In some cases, you may want to specify the source MAC address you are sending packets from.
In order to achieve that, you need to execute the “arping” command with the “-s” option for “source” followed by the MAC address you want to ping.
$ arping -c 2 -s 00:60:70:12:34:56 <ip_address>
In this case, you have two possibilities :
- You are the owner of the MAC address and you can simply use the “-s” option.
- You are not the owner of the MAC address and you are trying to spoof the MAC address. In this case, you need to use the promiscuous mode. As a short reminder, the promiscuous mode is set to transmit all frames received by the NIC rather than the ones it was meant to receive.
In order to enable the promiscuous mode with the “arping” command, you need to use the “-p” option.
Using the options we used previously, this would lead us to the following command.
$ arping -c 2 -s 00:60:70:12:34:56 -p <ip_address>Conclusion
In this tutorial, you learnt how you can easily use the arping in order to ping IP addresses on your local network.
Using arping, you are able to populate your local ARP cache with the matching MAC address.
You also learnt that you are able to “spoof” your MAC address by using the promiscuous mode.
If you are interested in Linux System Administration, we have a complete section dedicated to it on the website, so make sure to check it out!

Credits : Icons made by Freepik from www.flaticon.com, thank you!
2 comments
[…] Arping Command on Linux Explained […]
I have observed a case where I could arping a unit on a LAN but not ping. How is that possible? Exactly what is the difference that makes it possible?