
If you are working on a small to medium entreprise network, you probably have dozens of drives and printers that need to be shared.
Besides the NFS protocol, there are plenty of other network protocols that can be used in order to share resources over a network.
The CIFS, short for Common Internet File System, is a network filesystem protocol used to share resources among multiple hosts, sharing the same operating system or not.
The CIFS, also known as the SMB protocol, is implemented by one popular tool : the Samba server.
Started in 1991, Samba was developed in the early days in order to ease the interoperability of Unix and Windows based systems.
In this tutorial, we are going to focus on the Samba installation and configuration for your network.
Prerequisites
In order to install new packages on your system, you will need to be a user with elevated permissions.
To check if you are already a sudo user, you can run the “groups” command and check if “sudo” belongs to the list.
$ groups

user sudo netdev cdrom
If you don’t belong to the sudo group, you can check one of our tutorials in order to gain sudo privileges for Debian instances.
Now that you have sudo privileges, let’s jump right into the Samba server installation.
Installing Samba on Debian
Before installing Samba, you will need to make sure that your packages are up-to-date with the Debian repositories.
$ sudo apt-get updateNow that your system is up-to-date, you can run the “apt-get install” command on the “samba” package.
$ sudo apt-get install sambaWhen installing Samba, you will be presented with the following screen.
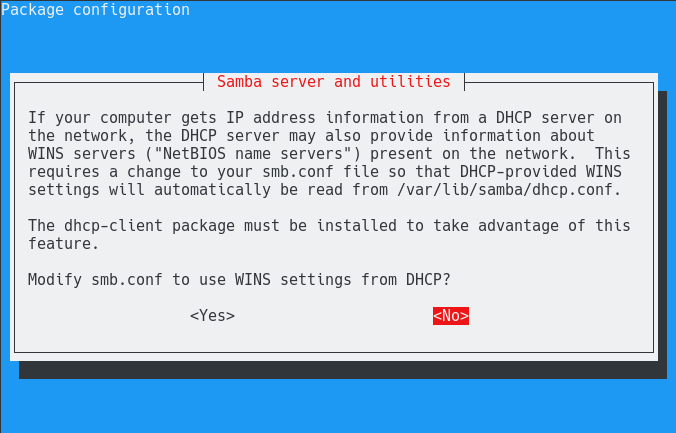
In short, this window is used in order to configure retrieval of NetBIOS name servers over your network.
Nowadays, your entreprise network is most likely using DNS name servers in order to store static information about hostnames over your network.
As a consequence, you are most likely not using a WINS server, so you can select the “No” option.
When resuming the installation, APT will unpack and install the packages needed for Samba.
Additionnally, a “sambashare” group will be created.
After the installation, you can check the version used on your system by running the “samba” command with the “-v” option.
$ samba -V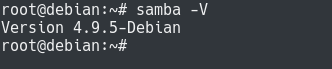
You can also verify that the Samba server is running by checking the status of the Samba SMB Daemon with systemctl.
$ systemctl status smbd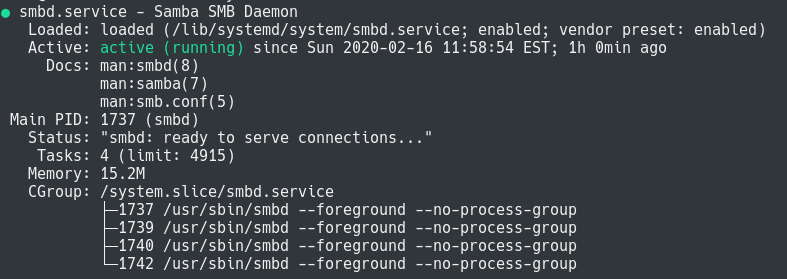
Great, Samba is now correctly installed on your Debian server!
Opening Samba Ports on your firewall
This section only applies if you are using UFW or FirewallD on your server.
In order for Samba to be reachable from Windows and Linux hosts, you have to make sure that ports 139 and 445 are open on your firewall.
On Debian and Ubuntu, you are probably using the UFW firewall.
In order to open ports on your UFW firewall, you have to use the “allow” command on ports 139 and 445.
$ sudo ufw allow 139
$ sudo ufw allow 445

$ sufo ufw status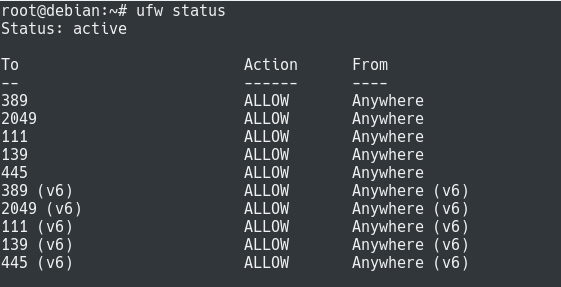
If you are working on a CentOS or a RHEL server, you will have to use the “firewall-cmd” in order to open ports on your computer.
$ sudo firewall-cmd --permanent --add-port=139/tcp
success
$ sudo firewall-cmd --permanent --add-port=445/tcp
success
$ sudo firewall-cmd --reload
success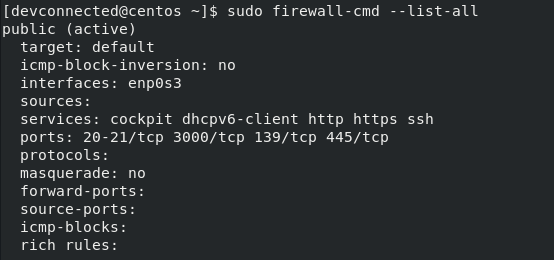
Configuring Samba on Debian
Now that your Samba is correctly installed, it is time to configure it in order to configure it in order to be able to export some shares.
Note : Samba can also be configured in order to act as a domain controller (like Active Directory) but this will be explained in another tutorial.
By default, the Samba configuration files are available in the “/etc/samba” folder.
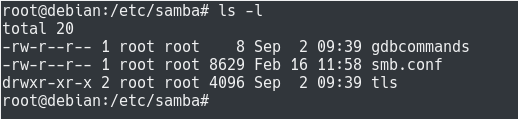
By default, the Samba folder contains the following entries :
- gdbcommands : a file containing a set of entries for the GDB debugger (won’t be used at all here);
- smb.conf : the main Samba configuration file;
- tls : a directory used in order to store TLS and SSL information about your Samba server.
For this section, we are going to focus on the content of the smb.conf file.
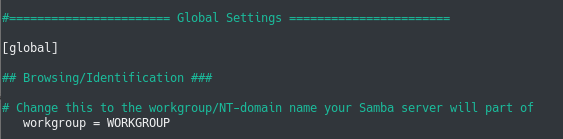
The Samba configuration file is composed of different sections :
- global : as its name indicates, it is used in order to define Samba global parameters such as the workgroup (if you are using Windows), the log location, as well as PAM password synchronization if any;
- shares definitions : in this section, you will list the different shares exported by the Samba server.
Defining the Windows workgroup
If you plan on including the Samba server into a Windows workgroup, you will need to determine the workgroup your computers belong to.
If you are working on a Unix-only network, you can skip this section and jump right into share definition.
Note : if you are using a domain controller, those settings do not apply to you.
In order to find your current workgroup, head over to the Windows Start Menu, and search for “Show which workgroup this computer is on”.
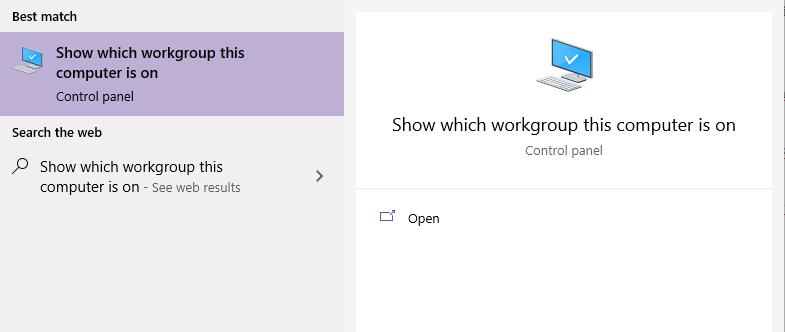
Select the option provided by the search utility and you should be able to find your workgroup in the next window.

In this case, the workgroup name is simply “WORKGROUP“.
However, you will have to make sure that this name is reflected in the Samba configuration file.
Now that your workgroup is properly configured, let’s start by defining simple share definitions for your Samba server.
Defining Samba share definitions
On Samba, a share is defined by specifying the following fields :
- Share name : the name of the share as well as the future address for your share (the share name is to be specified into brackets);
- Share properties : the path to your share, if it is public, if it can be browsed, if you can read files or create files and so on.
In order to start simply, let’s create a Samba share that will be publicly available to all machines without authentication.
Note : it is recommended to setup Samba authentication if you are exporting shares containing sensitive or personal information.
Creating a public Samba share
First of all, you will need to decide on the folder to be exported on your system, for this tutorial we are going to choose “/example”.
In order for users to be able to write files to the share, they will need to have permissions on the share.
However, we are not going to set full permissions to all users on the folder, we are going to create a system account (that has write permissions) and we are going to force user to use this account when logging to Samba.
In order to create a system account, use the “useradd” command with the “-r” option for system accounts.
$ sudo useradd -rs /bin/false samba-public

$ sudo chown samba-public /example

$ sudo chmod u+rwx /example
In order to create a public Samba share, head over to the bottom of your Samba configuration file and add the following section.
$ nano /etc/samba/smb.conf

[public]
   path = /example
   available = yes
   browsable = yes
   public = yes
   writable = yes
   force user = samba-public
Here is an explanation of all the properties specified in this Samba share definition :
- path : pretty self-explanatory, the path on your filesystem to be exported with Samba;
- available : meaning that the share will be exported (you can choose to have shares defined but not exported);
- browsable : meaning that the share will be public in network views (such as the Windows Network view for example);
- public : synonym for “guest ok”, this parameter means that everyone can export this share;
- writable : meaning that all users are able to create files on the share.
- force user : when logging, users will take the identify of the “samba-public” account.
Before restarting your smbd service, you can use the “testparm” in order to check that your configuration is syntactically correct.
$ testparm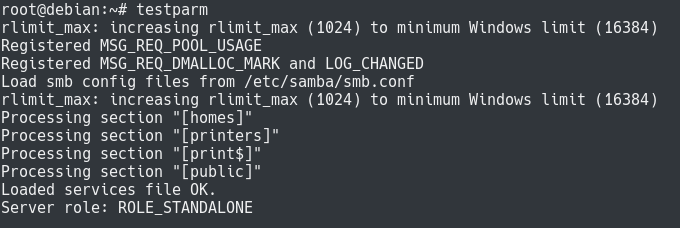
As you can see, no syntax errors were raised during the configuration verification, so we should be good to go.
Now that your share definition is created, you can restart your smbd service in order for the changes to be applied.
$ sudo systemctl restart smbd
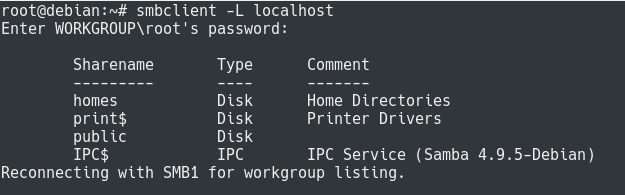
$ sudo systemctl status smbdYour share should now be accessible : in order to verify it, you can install the “samba-client” package and list the shares exported on your local machine.
$ sudo apt-get install smbclient

$ smbclient -L localhost
Note : you will be asked to provide a password for your workgroup. In most cases, you have no password for your workgroup, you can simply press Enter.
Connecting to Samba from Linux
In order to be able to mount CIFS filesystems, you have to install CIFS utilities on your system.
$ sudo apt-get install cifs-utilsNow that CIFS utilities are installed, you will be able to mount your filesystem using the mount command.
$ sudo mount -t cifs //<server_ip>/<share_name> <mountpoint>Using our previous example, our exported share was named “public” and it was available on the 192.168.178.35 IP address.
Note : you can follow this tutorial if you are not sure how you can find your IP address on Linux.
If we were to mount the filesystem on the “/mnt” mountpoint, this would give
$ sudo mount -t cifs //192.168.178.35/public /mnt -o uid=devconnected

Password for root@//192.168.178.35/public : <no_password>
Now that your drive is mounted, you can access it like any other filesystem and start creating files on it.
Congratulations, you successfully mounted a CIFS drive on Linux!
Connecting to Samba from Windows
If you are using a Windows host, it will be even easier for you to connect to a Samba share.
In the Windows Search menu, look for the “Run” application.

In the Run windows, connect to the Samba share using the same set of information than the Linux setup.
Be careful : on Windows, you have to use backslashes instead of slashes.
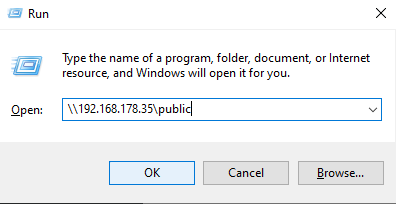
When you are done, simply click on “Ok” in order to navigate your share!
Awesome, you successfully browsed your Samba on Windows!
Securing Samba shares
In the previous sections, we have created a public share.
However, in most cases, you may want to build secure share that are accessible only by a restricted number of users on your network.
By default, Samba authentication is separated from Unix authentication : this statement means that you will have to create separate Samba credentials for your users.
Note : you may choose to have Samba built as an AD/DC but this would be a completely different tutorial.
In order to create a new Samba, you need to use the “smbpasswd” command and specify the name of the user to be created.
$ smbpasswd <user>Note : the user you are trying to create with Samba needs to have a Unix account already configured on the system.
Now that your user is created, you can edit your Samba configuration file in order to make your share secure.
$ nano /etc/samba/smb.conf

[private]
   path = /private
   available = yes
   browsable = yes
   public = no
   writable = yes
   valid users = <user>
Most of the options were already described in the previous section, except for the “valid users” one which, as its name specifies, authorizes the Samba access to a restricted list of users.
Again, you can test your Samba configuration with the “testparm” command and restart your Samba service if everything is okay.
$ testparm

$ sudo systemctl restart smbd

$ sudo systemctl status smbd
Now that your drive is secured, it is time for you to start accessing it from your remote operating systems.
Connecting to secure Samba using Windows
On Windows, you will have to use the same procedure than the previous step : execute the “Run” application and type the address of your share drive.
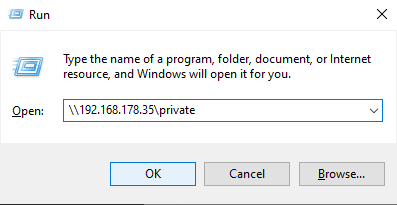
When clicking on “Ok”, you will be presented with a box asking for your credentials : you have to use the credentials you defined in the previous section with smbpasswd.
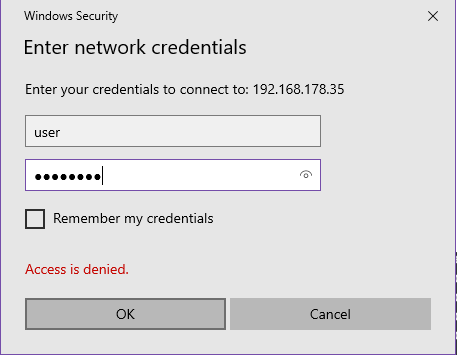
If you provided the correct password, you should be redirected to your network drive, congratulations!
Connecting to secure Samba using Linux
In order to connect to a secure Samba share using Linux, you have to use the “mount” command and provide the address of the share as well as the mount point to be used.
$ sudo mount -t cifs //<share_ip>/<share_name> <mount_point> -o username=<user>Using the example of our “private” share on the 192.168.178.35 IP address, this would result in the following command :
$ sudo mount -t cifs //192.168.178.35/private /mnt -o username=user

Password for user@//192.168.178.35/private: <provide_password>
That’s it!
Your drive should now be correctly mounted.
You can verify that it was correctly mounted with the “findmnt” command that lists mounted filesystems.
$ findmnt /mnt
Congratulations, you successfully mounted a secure Samba share on your server!
Conclusion
In this tutorial, you learnt how you can easily install and configure a Samba server in order to share your drives.
You also learnt that you can tweak Samba share options in order to make your shares secure, whether you are using Windows or Linux.
Samba is an important tool working on the interoperability of operating systems : if you are interested in the Samba project, you should definitely check their website.
They are also providing a free alternative to Active Directory where Samba can be configured to act as a domain controller.
If you are interested in Linux System Administration, we have a complete section dedicated to it on the website, so make sure to check it out!

7 comments
Very helpful article, do you have this information in a format that I could download or print as pdf ?
Very good and educational – needs to include command “mkdir /example” that was missing.
Thank you!
Could a pointer to the Active Directory information referred to… I seem to have a problem finding it.
Extremely well written. I’ve had “writeable” (copied from somewhere) instead of “writable” for a long time. This fixed it!
smbpasswd -a
To create e NEW user… Thanks for the article very usefull.
Installed SAMBA on Raspberry pi, running on Debian 10, using this article and it setup perfectly without issue.
The public folder on pi is shared with Windows machines on my home network. I’m just sorry I waited so long to try samba.
Thank you!