
This tutorial discusses the ways to check disk space on Linux using the command line or graphical tools.
As a system administrator, you always want to make sure that you have enough space for your hosts to run.
Luckily for you, there are plenty of commands that you can use in order to check disk space on Linux.
Checking disk space is essential : if you don’t monitor it, you may be unable to connect to your host or to perform any commands on it.
As a consequence, we are going to see how you can check your disk space, but also how you can monitor it in order to make sure you are not too late.
Check Disk Space on Linux using df
The easiest and more popular way to check your disk space is to run the df command.
$ df <options>If you run the “df” command, this is the output that you would get.
ubuntu:~$ df
Filesystem     1K-blocks     Used Available Use% Mounted on
udev             2007152        0   2007152   0% /dev
tmpfs             403960      716    403244   1% /run
/dev/vda1       81120644 31236604  49867656  39% /
tmpfs            2019792        0   2019792   0% /dev/shm
tmpfs               5120        0      5120   0% /run/lock
tmpfs            2019792        0   2019792   0% /sys/fs/cgroup
/dev/vda15        106858     3668    103190   4% /boot/efi
tmpfs             403956        0    403956   0% /run/user/0
tmpfs             403956        0    403956   0% /run/user/1000
By default, the df command shows six columns :
- Filesystem : the name of the filesystem that may be equal to the partition name on your filesystem (/dev/vda1 or /dev/sda1 for example);
- 1K-blocks : the number of blocks on the filesystem of size 1Kb. The /dev/vda1 contains 81120644 1K-blocks, it has 81120644000 bytes or 78,5 gigabytes of space in total;
- Used : the number of 1K-blocks used on the filesystem;
- Available : the number of 1K-blocks available for the filesystem;
- Use % : the percentage of disk used on the filesystem;
- Mounted on : the mountpoint used in order to mount the filesystem.
As you can see, the output of the df command is not very human readable or user-friendly.
Counting the number of 1K-blocks is not very handy if you want to check your disk space on your Linux systems.
Check Disk Space in Human Readable Format
Luckily for you, there is an option that you can provide to the df command in order to rearrange the final output.
To check disk space in a human readable way, you have to use the “-h” flag.
$ df -h

Filesystem      Size  Used Avail Use% Mounted on
udev            2.0G     0  2.0G   0% /dev
tmpfs           395M  716K  394M   1% /run
/dev/vda1        78G   30G   48G  39% /
tmpfs           2.0G     0  2.0G   0% /dev/shm
tmpfs           5.0M     0  5.0M   0% /run/lock
tmpfs           2.0G     0  2.0G   0% /sys/fs/cgroup
/dev/vda15      105M  3.6M  101M   4% /boot/efi
tmpfs           395M     0  395M   0% /run/user/0
tmpfs           395M     0  395M   0% /run/user/1000
As you can see, instead of showing the number of 1K-blocks on your filesystems, you are presented with the total size of your filesystems.
Instead of having to perform the conversion by yourself, you can directly see that your disk is 78Gs big in size, that it has 30 GBs used and that 48 GBs are still available.
Note that the “-h” option provides sizes in powers of 1024.
If you want to compute total sizes using powers of 1000, you will have to use the “-H” option.
$ df -H

udev            2.1G     0  2.1G   0% /dev
tmpfs           414M  734k  413M   1% /run
/dev/vda1        84G   32G   52G  39% /
tmpfs           2.1G     0  2.1G   0% /dev/shm
tmpfs           5.3M     0  5.3M   0% /run/lock
tmpfs           2.1G     0  2.1G   0% /sys/fs/cgroup
/dev/vda15      110M  3.8M  106M   4% /boot/efi
tmpfs           414M     0  414M   0% /run/user/0
tmpfs           414M     0  414M   0% /run/user/1000
In most of the cases, you may want to stick to the “-h” option as it you will be able to see the “real” size available on your filesystems.
Check Specific Filesystem Disk Space
In some cases, you may want to restrict your search to specific filesystems on your host.
To check disk space for a specific filesystem, you have to run the following command
$ df <options> <path>For example, to check disk information related to the root mountpoint, you would run
$ df -h /

Filesystem      Size  Used Avail Use% Mounted on
/dev/vda1        78G   30G   48G  39% /
In some cases, you may want to have a look at specific fields on the output.
To achieve this result, simply append a “–output” flag on your commands.
$ df -h --output='field1','field2' /For example, to show only the size and the usage percentage, you would run
$ df -h --output='size','pcent' /

Size Use%
78G  39%
Here is a list of all columns available for filtering with the df command : ‘source’, ‘fstype’, ‘itotal’, ‘iused’, ‘iavail’, ‘ipcent’, ‘size’, ‘used’, ‘avail’, ‘pcent’, ‘file’ and ‘target’
Check Inode Usage on Linux
In some very specific cases, you may need to check the inode usage on your Linux filesystems.
Why would you verify the inode usage?
As we discovered in the hard links and soft links article, files are tightly coupled with inodes on the filesystem.
You also learnt that your system is managing an inode table where entries point to blocks of data on your physical disk.
However, this inode table is limited in size : as a consequence, you may run out of inode entries before running out of disk space.
In short, if your system already handles too many files (tiny or not), it won’t be able to allocate more space to new files, even if your disk has 30GBs available.
In order to check inode usage on Linux, append the “–inodes” flag to the “df” command.
$ df --inodes

Filesystem       Inodes  IUsed    IFree IUse% Mounted on
udev             501788    384   501404    1% /dev
tmpfs            504948    617   504331    1% /run
/dev/vda1      10321920 320672 10001248    4% /
tmpfs            504948      1   504947    1% /dev/shm
tmpfs            504948      4   504944    1% /run/lock
tmpfs            504948     18   504930    1% /sys/fs/cgroup
/dev/vda15            0      0        0     - /boot/efi
tmpfs            504948     19   504929    1% /run/user/0
tmpfs            504948     10   504938    1% /run/user/1000
Similarly, you can check inode usage in a human readable way by specifying the “-h” option.
$ df -h --inodes /

Filesystem     Inodes IUsed IFree IUse% Mounted on
/dev/vda1        9.9M  314K  9.6M    4% /
In this section, you learnt how you can check disk space using df.
However, if you want to check disk usage for directories and files, you are going to use the “du” command.
Check Disk Space on Linux using du
The du command stands for “disk usage” and it is used in order to have disk usage information related to directories and files on your system.
$ du <option> <path|file>

$ du <option> <path1> <path2> <path3>
As specified, you can either have the disk usage for a specific file, or for a path on the system.
Check File Disk Usage
In order to check the disk usage of a specific file, simply append the name of the file to the du command.
For example, to check the size of the .bashrc file, you would run
$ du ~/.bashrc
4       /home/schkn/.bashrc
By default, sizes are displayed in kilobytes, but you can change the default display by specifying a size format with the “-B” option.
$ du -BM ~/.bashrc
1M      /home/schkn/.bashrc
Note that sizes will be rounded to the nearest whole number. In this case, the .bashrc file is not 1Mb large in size, but it has been rounded automatically.
You can also choose to have sizes displayed in a human readable format, verifying that sizes are indeed displayed in kilobytes.
$ du -h ~/.bashrc
4.0K    /home/schkn/.bashrc
The “-h” option can be combined with the “–apparent-size” option in order to get the real size of a file without rounding.
$ du -h --apparent-size ~/.bashrc
3.7K    /home/schkn/.bashrc
Check Directory Disk Usage
On the other hand, you can check directory disk usage by specifying a path to the du command.
For example, if you are looking for the disk usage for all home directories on the filesystem, you would run
$ du /

0       /sys/kernel/slab/:d-0002048/cgroup
0       /sys/kernel/slab/:d-0002048
0       /sys/kernel/slab/:A-0000704/cgroup/files_cache(74510:logstash.service)
0       /sys/kernel/slab/:A-0000704/cgroup/files_cache(96484:systemd-udevd.service)
0       /sys/kernel/slab/:A-0000704/cgroup/files_cache(70164:kibana.service)
However, in some cases, you don’t want to see the output for every single file or directory on the path, but rather a total for the given path.
To check the total disk usage for a given path, use “du” with the “-shc” option.
In some directories, you will need to have sudo privileges (on Debian/Ubuntu, or on RHEL/CentOS)
$ sudo du -shc /home

2.8G    /home
2.8G    total

$ sudo du -shc /home /var/log
2.8G    /home
15G     /var/log
18G     total
Here is a breakdown of the options used :
- -s : for summarize, it will display a total for each path provided instead of the full listing of every single file and directory in it;
- -c : for grand total, if you specify multiple paths, it will sum them in order to produce a grand total for them;
- -h : for human readable, it will display results with units.
Check Disk space using wildcards
In some cases, you may want to have the disk usage for all your text files or all your pictures.
Luckily for you, you can use wildcards in order to filter the items returned by the du command.
For example, in order to search for all pictures on your system and the disk space they use, you would run
To have the disk space used by all your PNG files on your system, you can bind the find command with the du command.
$ find / -name *.png 2> /dev/null | xargs du -ch

8.0K    /usr/share/grafana/public/app/plugins/datasource/graphite/img/graphite_logo.png
44K     /usr/share/grafana/public/app/plugins/app/example-app/img/logo.png
4.0K    /usr/share/grafana/public/img/fav32.png
12K     /usr/share/grafana/public/img/mstile-150x150.png
34M     total
Similarly, you can look for text files on your system using the same wildcard.
find / -name *.txt 2> /dev/null | xargs du -ch

4.0K    /usr/lib/vendor/tensorboard-1.12.2.dist-info/top_level.txt
4.0K    /usr/lib/vendor/urllib3-1.24.1.dist-info/LICENSE.txt
4.0K    /usr/lib/vendor/urllib3-1.24.1.dist-info/top_level.txt
22M     total
On the other hand, if you want to exclude some patterns, it is also possible with the du command and the “–exclude” option.
$ du --exclude='*.o'Check Disk Space on Linux using pydf
The du and df commands are very popular among system administrators.
However, the pydf command can also be useful if you are looking for a disk utility tool that displays information in a user friendly way.
In order to install pydf, you need to be sudo on your host.
To verify it, run the following command.
$ sudo -l

User <user> may run the following commands on user-ubuntu:
    (ALL : ALL) ALL
Next, depending on your distribution, run one of the following commands to install pydf.
$ sudo apt-get install pydf    [For Ubuntu / Debian ]
$ sudo yum install pydf        [For RHEL / CentOS ]
Next, when pydf is installed, run the command and provide the mountpoint you want to inspect.
$ pydf
Filesystem Size  Used Avail Use%                            Mounted on
/dev/vda1   77G   30G   48G 38.5 [#########...............] /
/dev/vda15 104M 3668k  101M  3.4 [#.......................] /boot/efi

$ pydf /
Filesystem Size Used Avail Use%                             Mounted on
/dev/vda1   77G  30G   48G 38.5 [##########...............] /
Check Disk Space on GNOME
On modern graphical desktop environments, you are also provided with a set of tools that analyze your disk in order to provide disk usage statistics.
One of them is called the Disk Usage Analyzer.
The Disk Usage Analyzer, embedded in GNOME 3.30 by default, is a graphical tool that analyzes the disk usage on your system as well as the way it is distributed among your different folders.
To open the disk usage analyzer, head over to the Activities panel in GNOME.
In the Activities panel, search for “Disk Usage Analyzer“.
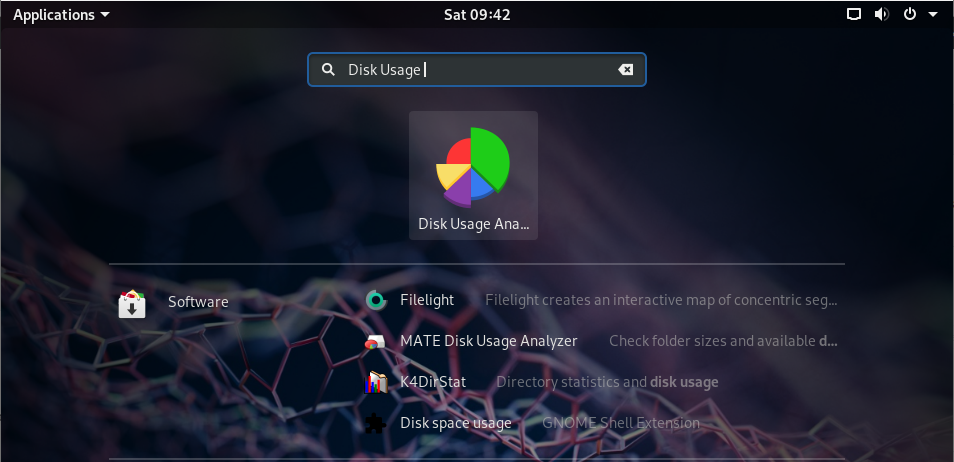
You should be presented with the following option, click on it to start the DUA.
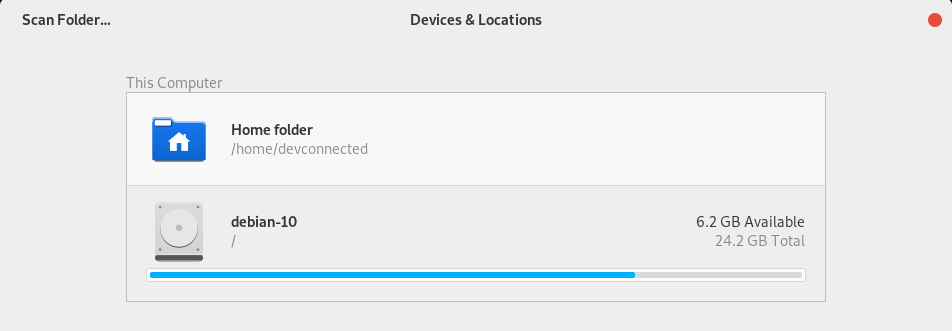
On the “Devices & Locations” window, you should see your home directory and your different disks.
In the Disk Usage Analyzer, you have the option to scan a folder or to inspect an entire disk.
Scan Folder on GNOME
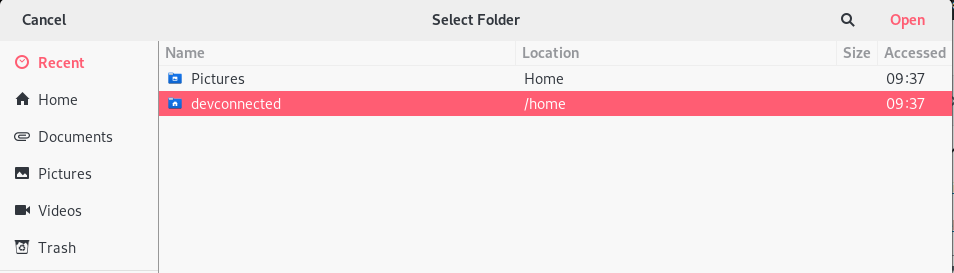
To scan a specific folder, click on the “Scan Folder…” option at the top-left corner of the window.

On the next window, you are free to choose the folder you want to inspect.
Select your home directory, and click on “Open” to start the disk analysis.
On the next window, you should see a complete disk analysis for the folder selected.
You can navigate through the different folders in order to see how space is distributed on your different folders.
A distribution and interactive graph is also present on the side.
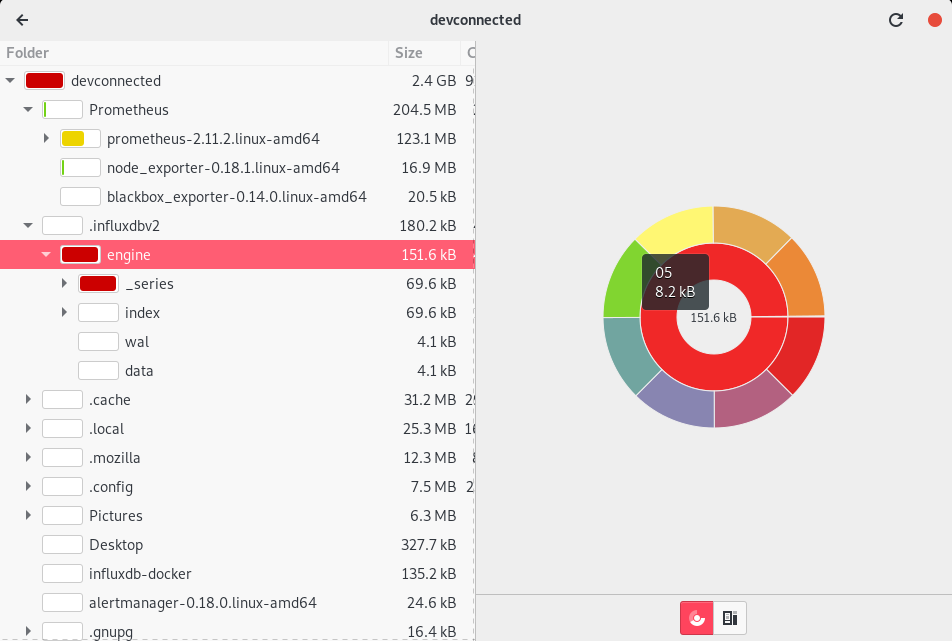
The Disk Usage Analyzer is a great tool if you are not very familiar with the command line and if you want to have a graphical representation of your disk usage.
Now that you know how to check for disk space on GNOME, let’s see how you can achieve the same result on KDE.
Check Disk Space on KDE
To illustrate this chapter, we are going to use a Kubuntu 19.10 fresh distribution.
In order to look for disk space distribution on KDE, you are going to install Filelight.
$ sudo apt-get install filelight   [Ubuntu / Debian ]

$ sudo yum install filelight       [CentOS / RHEL]
Filelight is a graphical application that also displays disk usage on specific folders or on disks.
To start Filelight, simply run the “filelight” command in a terminal console.
$ filelight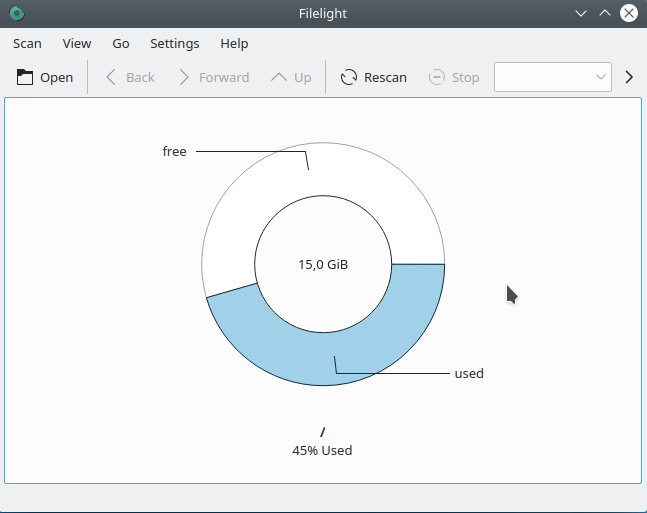
By default, Filelight will open and displays the space used for your root partition in %Used vs %Free.
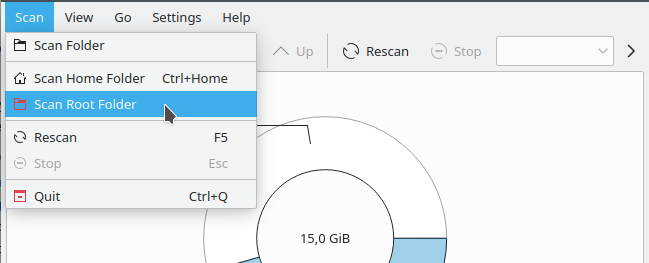
If you need a more precise distribution, hit the “Scan” option at the top-left corner of the application and select “Scan Root Folder”.
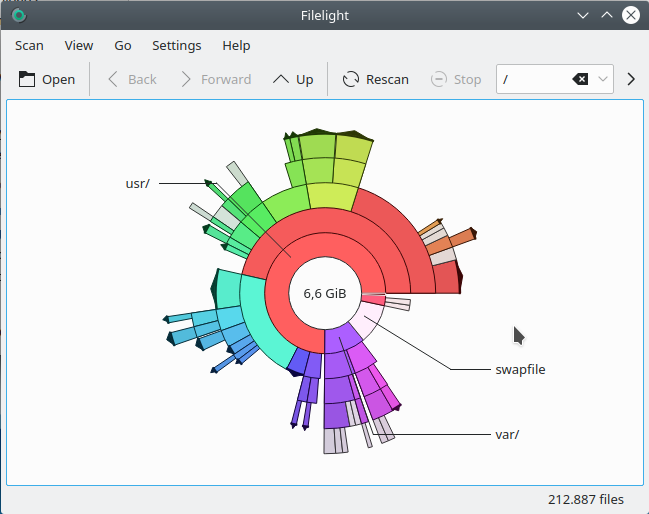
After a while, you should be able to see a complete analysis of your root partition.
Note that you need to run filelight as a sudo user in order to avoid having permissions issues when inspecting the folders on your root partition.
Real time disk space monitoring
In some cases, you may need to have a live and “real time” monitoring of your disks.
Here are some options that you can use in order to monitor your disk spaces :
- Implement Prometheus with the Node Exporter and the “filesystem” collector.
As a reminder, the Node Exporter is an exporter that exposes host metrics to the Prometheus time series database. The “filesystem” collector specializes in aggregating data about disk usage for all distributions.
If you need a guide for the Node Exporter, make sure to read our dedicated article.
Also, if you need a guide to install Prometheus properly, make sure to read our guide about it.
- Implement InfluxDB and Telegraf with the “Disk” input plugin.
Another alternative is to implement the TIG stack and to enable the “Disk” input plugin that specializes in monitoring disk usage on Linux systems.
To setup Telegraf, InfluxDB and Grafana, read our detailed guide.
Also, make sure to read the detailed documentation of the disk input plugin on Github.
Conclusion
In this detailed tutorial, you learnt how you can check and monitor your disk space on Linux.
You learnt about command lines utilities such as “df” and “du” and the options available to you.
You also learnt that you can monitor your disk space using modern tools : graphical ones (Filelight or Disk Usage Analyzer) or platforms (such as Prometheus or InfluxDB).
If you are curious about Linux System Administration, we have a section dedicated to it on the website : make sure to check it not to miss a guide.

2 comments
[…] the command executes successfully, you should be able to list your new mount point using the df […]
[…] check the actual size of your logical volume, you can check your used disk space using the “df” […]