")
This tutorial provides step-by-step instructions about how to install Debian 10 Buster with a GNOME desktop.
Debian 10 has been finally released on the 6th of July 2019, and it has come with a lot of very great features for system administrators:
- It is now using the version 3.30 of GNOME, featuring an increased desktop performance, screen sharing, and improved ways to remotely connect to Windows hosts;
- JDK update from the OpenJDK 8.0 to the new OpenJDK 11.0 version;
- Upgrade to Bash 5.0 essentially providing more variables for sysadmins to play with (EPOCHSECONDS or EPOCHREALTIME for example);
- IPtables is being replaced by NFtables, providing an easier syntax and a more efficient way to handle your firewall rules;
- Secure boot is now enabled by default, which means that you don’t have to disable it when trying to install Debian 10 on your machine;
- A lot of software updates: Apache 2.4.38, systemd 241, Vim 8.1, Python 3 3.7.2 and many more.
Now that you know what’s available in the brand new Debian 10 buster distribution, it is time for you to install it.
Here are the steps to install and configure Debian 10 buster
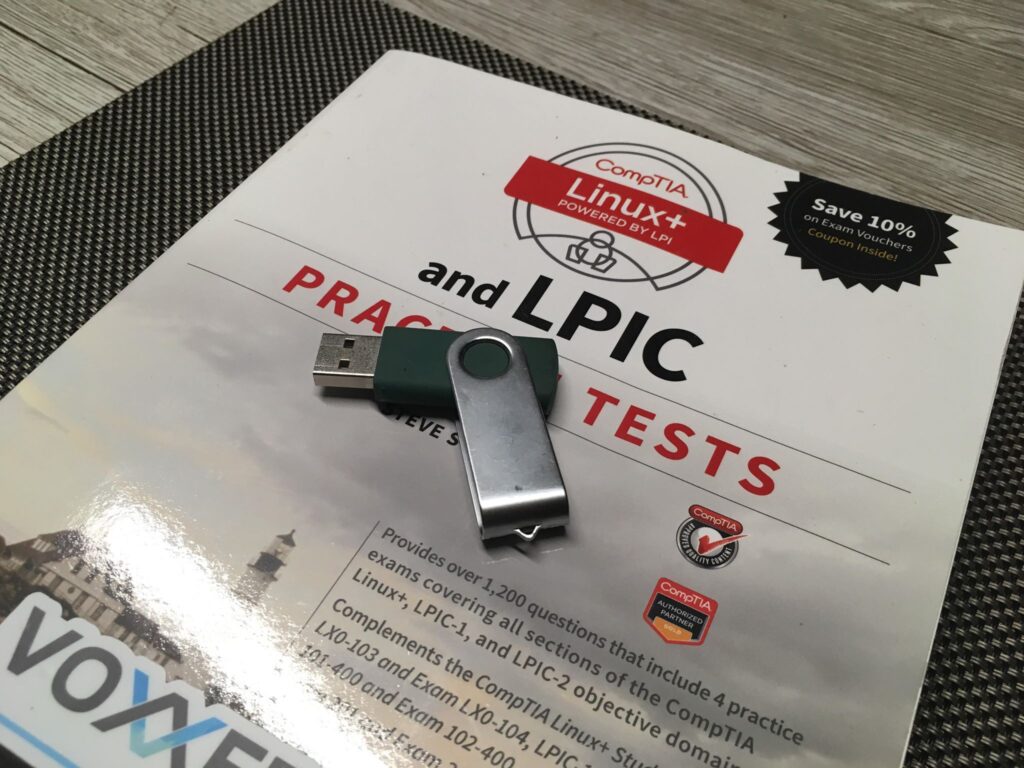
I – Create a Bootable USB stick on Linux
In order to install Debian 10 buster, you need to “flash” an ISO image to a USB stick, making it “bootable“.
The Debian 10 buster image is about 2 GB in size (if you choose to have a desktop environment with it), so I would recommand that you choose an USB drive that is at least 3GB large or more.
If you don’t have a USB drive that large, you can opt for minimal versions of Debian 10 Buster.
In my home setup, I have an Xubuntu 18.04 instance, so this is what I will use to create my bootable image.
Steps are pretty much the same for other distributions. For Windows, you would need to use Rufus to create a bootable image.
a – Plug your USB stick in the USB port
Within a couple of seconds, the operating system should automatically mount your USB drive in your filesystem (it should be mounted at the /media mountpoint by default).
b – Identify where your USB drive is mounted
To get the mountpoint of your USB drive, you can use the lsblk command.
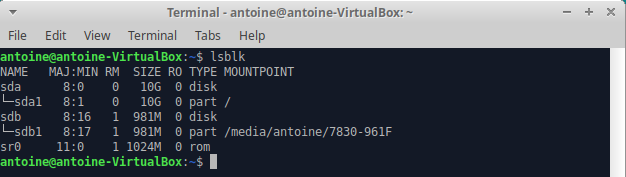
As you can see, my USB drive is named “sdb”, it has one partition (part) named “sdb1” and it is mounted on “/media/antoine/7830-961F”.
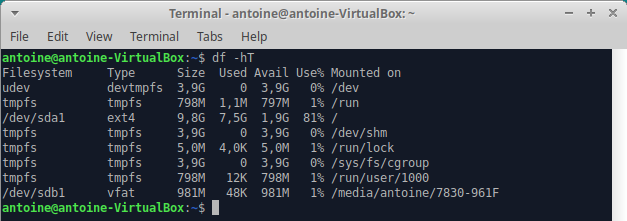
Alternatively, you could use the df command to have some information about the remaining space on your USB drive.
c – Download Debian 10 Buster ISO file
Your USB is ready, now you can download the ISO file to flash your drive.
The distribution images are located here. For this tutorial, I am using the Debian 10 Buster GNOME edition for amd64 processors.
If you are more familiar with another environment like Cinnamon or KDE, they are all available in the downloads page.
Run a simple wget command on any folder that you want (my home folder in this case)
$ wget https://cdimage.debian.org/debian-cd/current-live/amd64/iso-hybrid/debian-live-10.0.0-amd64-gnome.isoIf you need a more minimal distribution, you can go for the netinst version, but desktop environments might not be included.
$ wget https://cdimage.debian.org/debian-cd/current/amd64/iso-cd/debian-10.0.0-amd64-netinst.iso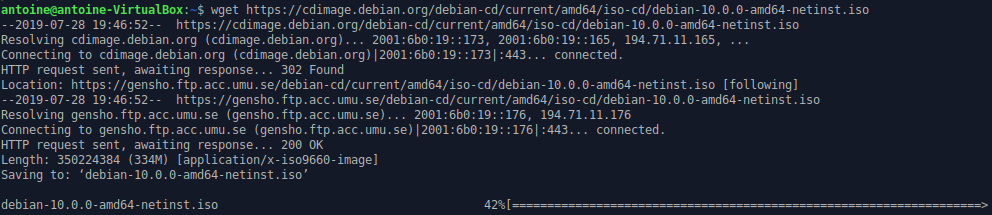
d – Copy the image to your USB drive
To copy the image, we are going to use the dd command.
$ sudo dd if=/home/antoine/debian-live-10.0.0-amd64-gnome.iso of=/dev/sdb && synce – Boot on the USB drive
Now that your USB drive contains the ISO file, it is time for you to boot from it.
On most configurations, you should be able to boot on the USB by pressing ESC, F1, F2 or F8 when starting your computer.
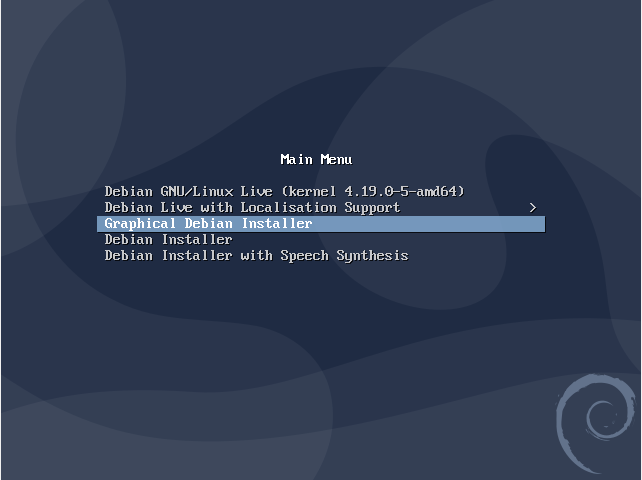
II – Follow the Debian 10 graphical installation steps
This is the screen that you should see once you successfully booted on the Debian 10 installer.
Select the “Graphical Debian Installer” option.
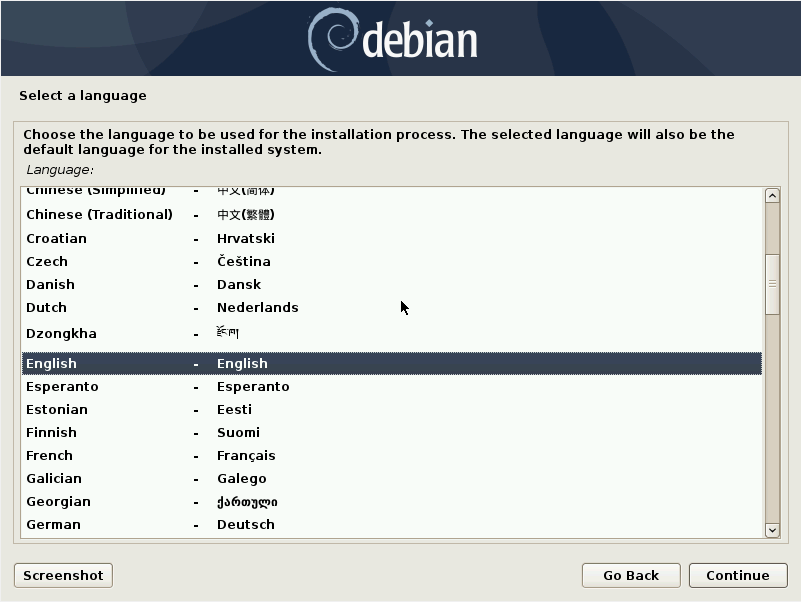
First, you are asked to select a language.
I’ll go for English for this one.
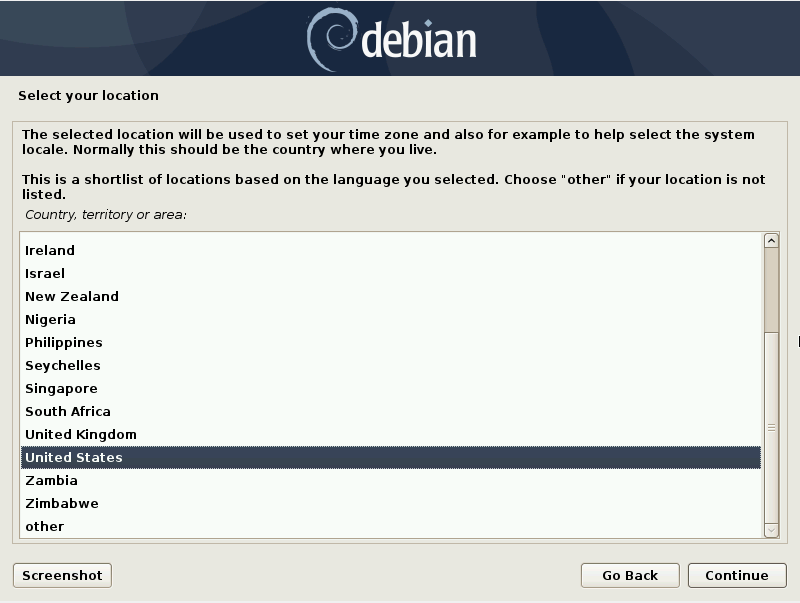
On the next screen, you are asked to select a location.
I’ll pick United States as an example.
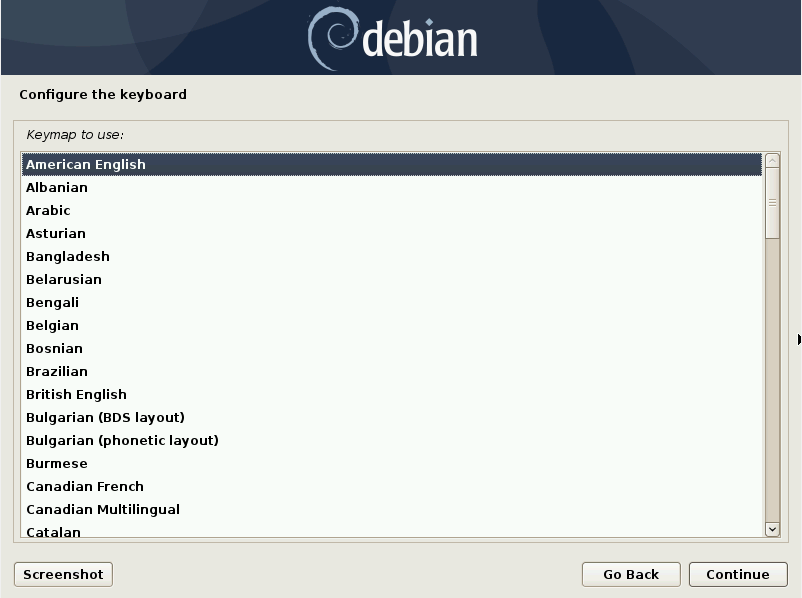
Then, choose your keyboard layout. (don’t worry, you can change it later on if you want).
I’ll go for American English for this example.
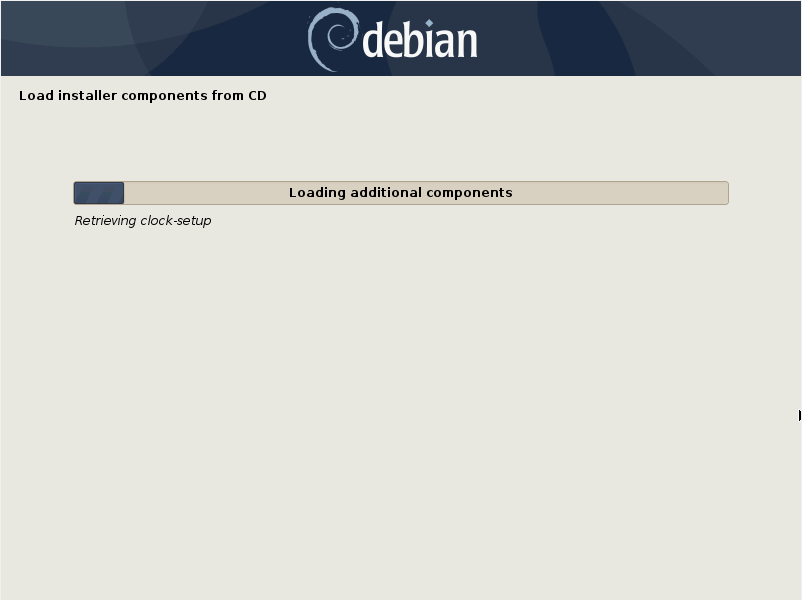
From there, a couple of automatic checks are done within your installation.
Debian 10 will try to load additional components from the bootable device and it will perform some automatic network checks.

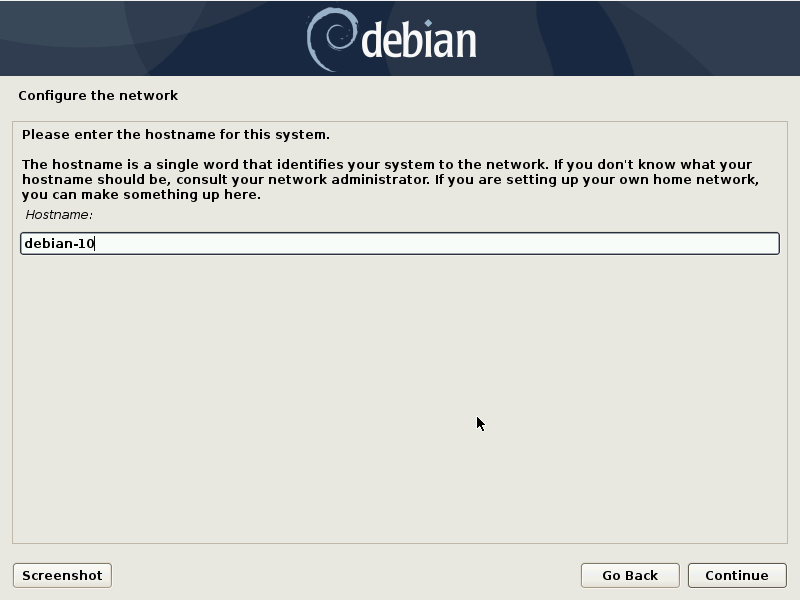
After the checks, you are asked to set a hostname for your computer.
As indicated, this is the name that will be used to identify your computer on a network.
I’ll go for “debian-10” in this case.
You are asked to configure the domain name for your host. You can leave this option blank.

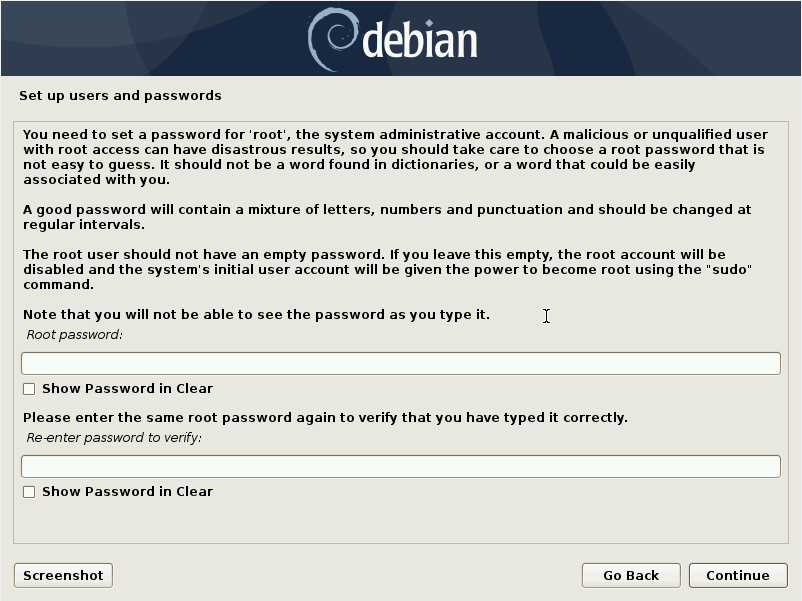
Be careful on the next step, there is a little bit of a gotcha when it comes to root passwords.
You want to leave this option blank.
As a consequence, Debian will use the password of the user you will create in the next step to perform sudo operations.
Moreover, the root account will be disabled which is interesting for security purposes.
Nonetheless, if you want to specify a specific password for root, you can do it here, but I wouldn’t recommend it.
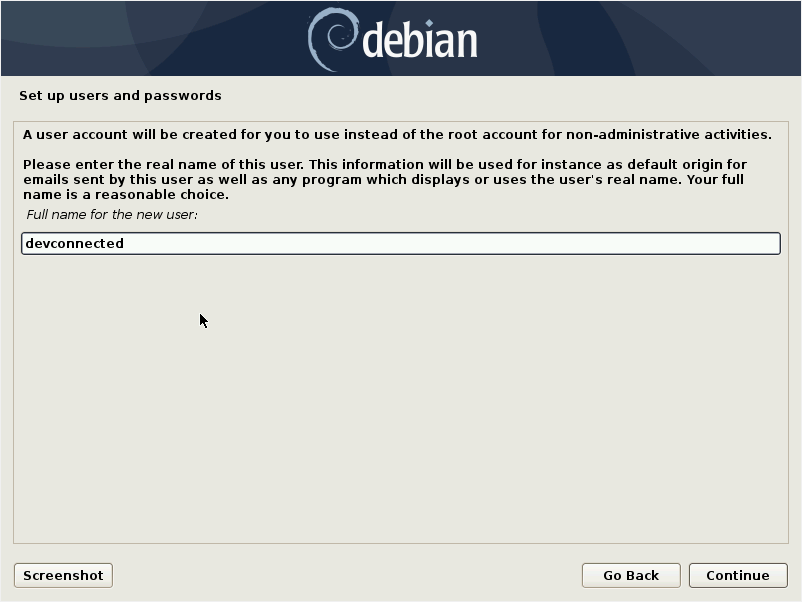
Click continue, and now it is time for you to specify the real name for the user.
I’ll go for devconnected but feel free to mention your real name and first name.
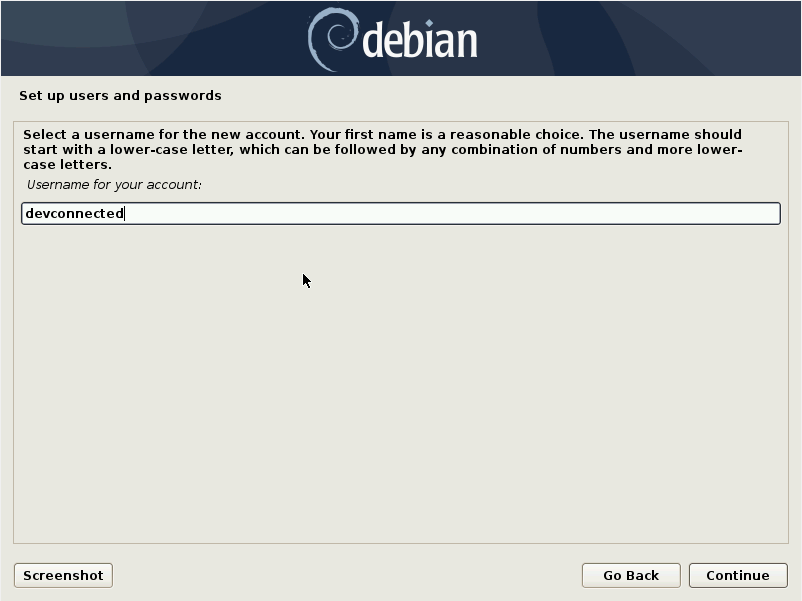
Then, you have to choose a username for your host.
Devconnected will do the trick for me.
Then, choose a very secure password for your host.

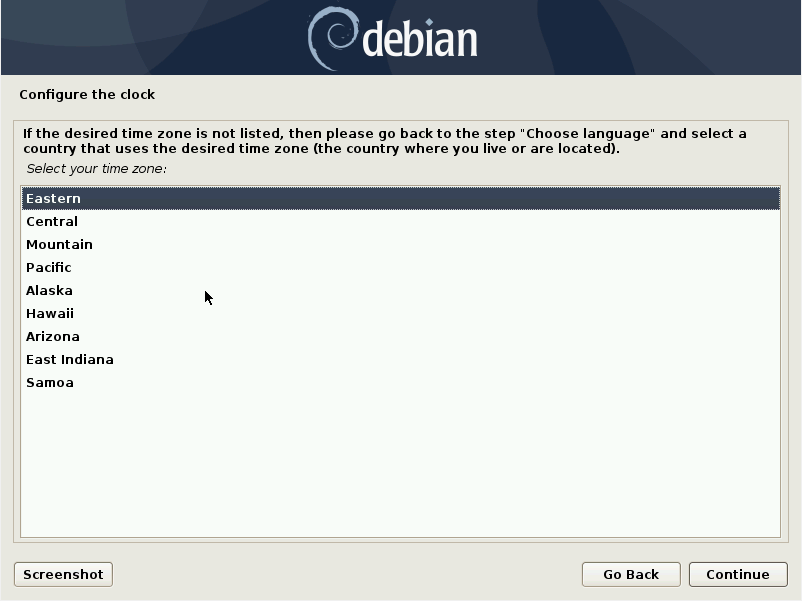
Choose a time zone for your host.
Be careful on this point as time zones are very important when it comes to logging for example.
From there, Debian 10 Buster will start detecting disks on your host.
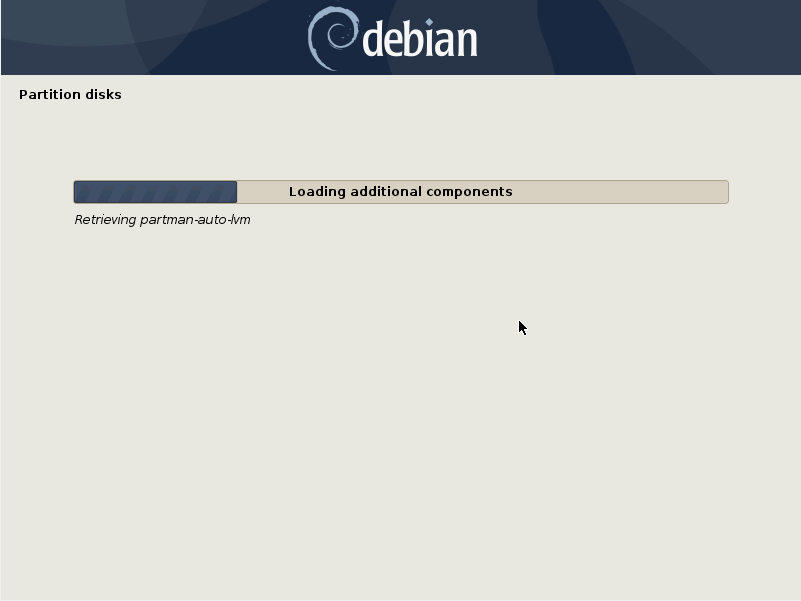
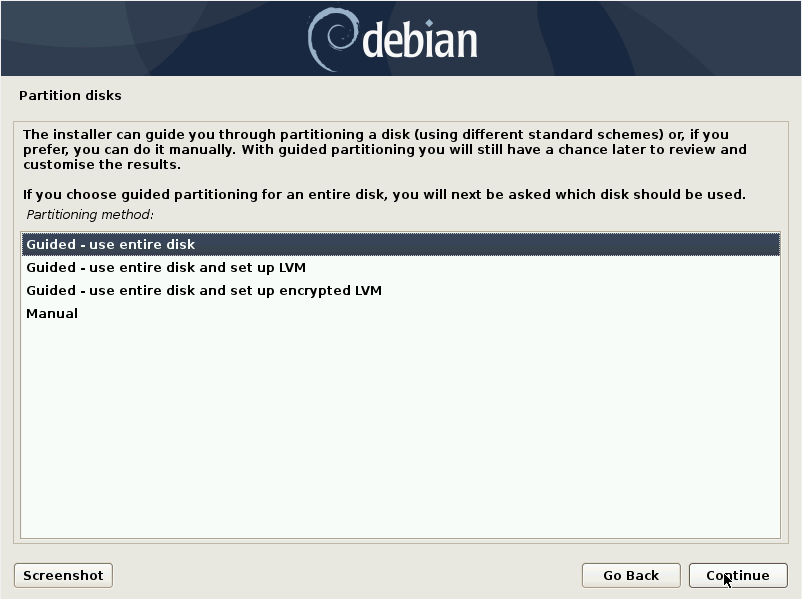
After it is done, you will be asked for a way to partition your disks.
Go for the Guided (use entire disk) version unless you have special requirements that need to setup LVM.
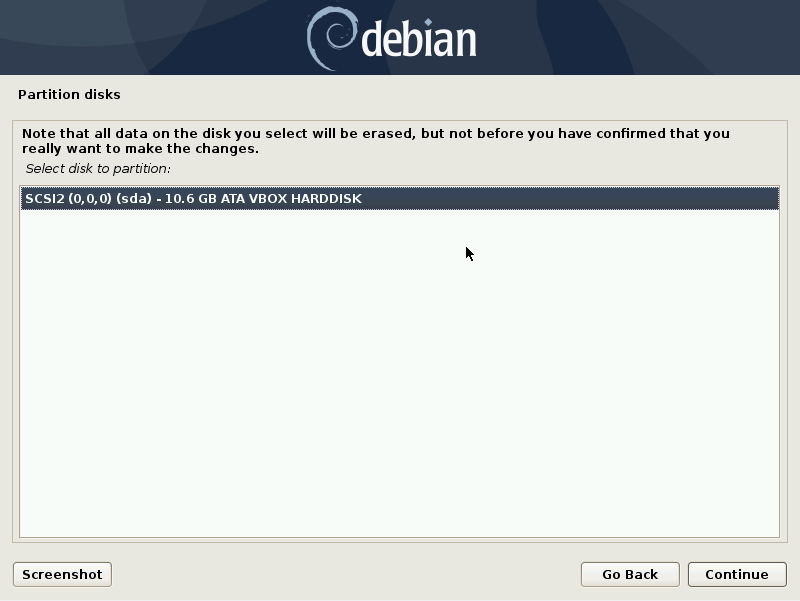
Select the disk you want to partition.
In my case, I have only one disk on the system, so I’ll pick it.
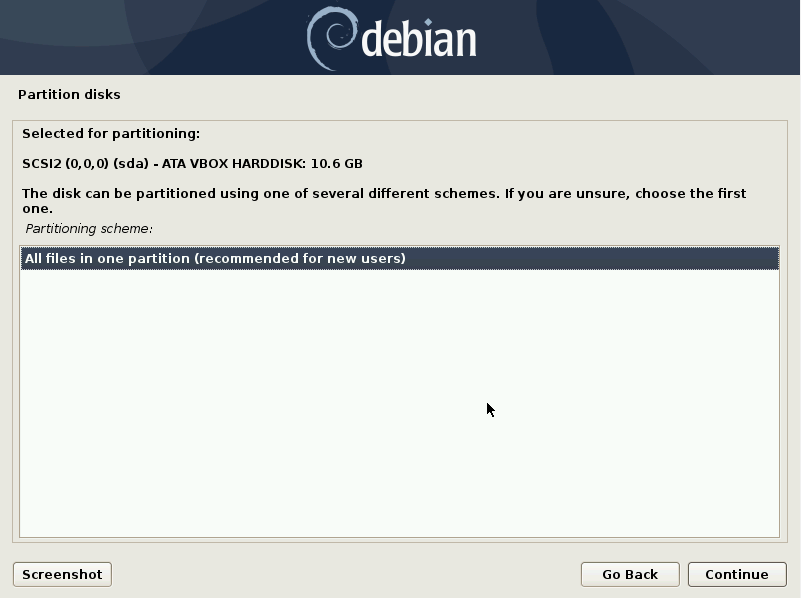
For the partitioning scheme, go for “All files in one partition“, that should suit your needs.
For the automatic partitioning, Debian 10 create two partitions, a primary and a swap one (when you run out of memory!)
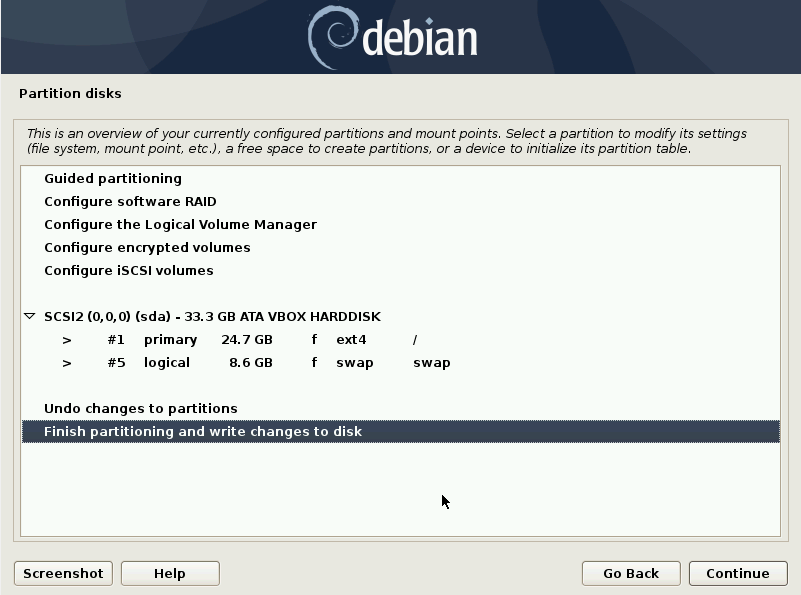
If you are happy with the partitioning, simply press the “Finish partitioning and write changes to disk” option.
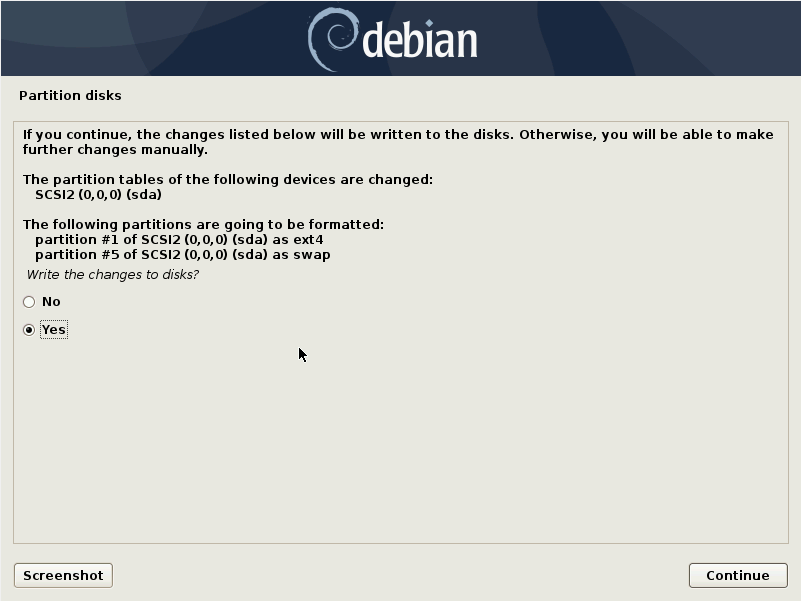
On the next screen, you are asked a confirmation about the previous partitioning.
Simply check “Yes” on the two options prompted.
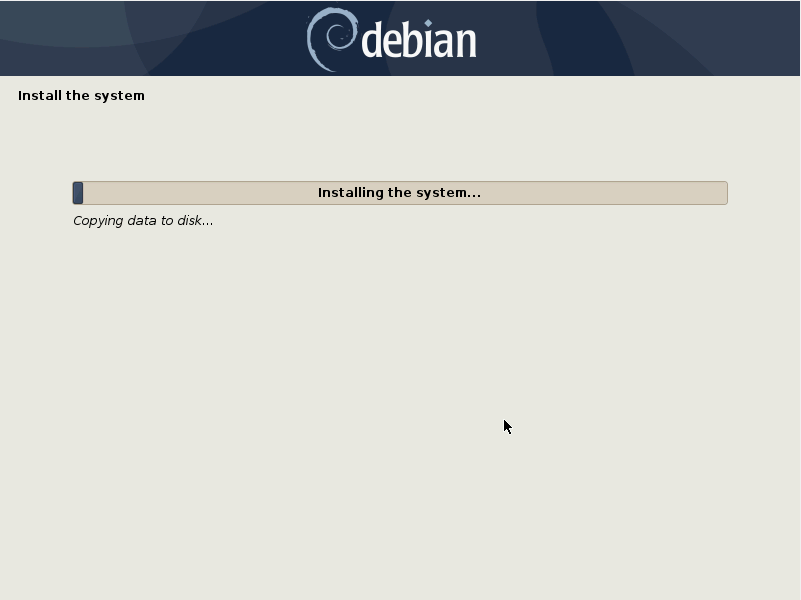
From there, the installation should begin on your system.
On the next step, you are prompted the choice to use a network mirror to supplement the software included in the USB drive.
You want to press “Yes“
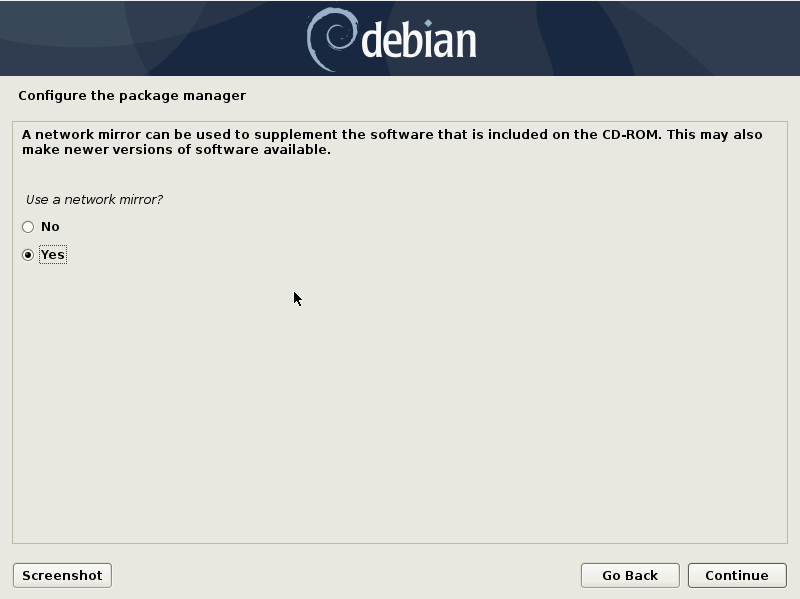
By pressing “Yes”, you are asked to choose a location that is close to your network. I’ll use the United States in this case.
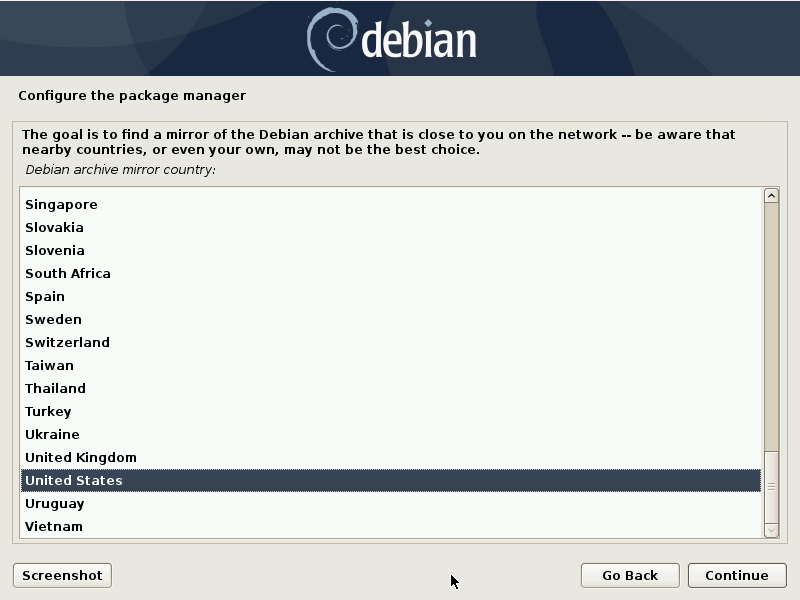
Then, choose a Debian archive mirror for your distribution.
I’ll stick with the deb.debian.org one.
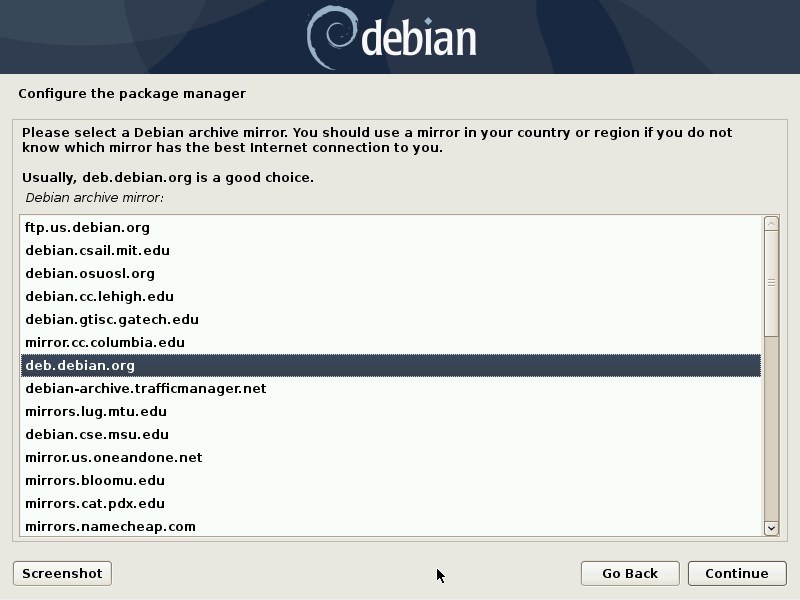
If you are using a proxy, this is where you want to configure it. I am not using one, so I’ll leave it blank.

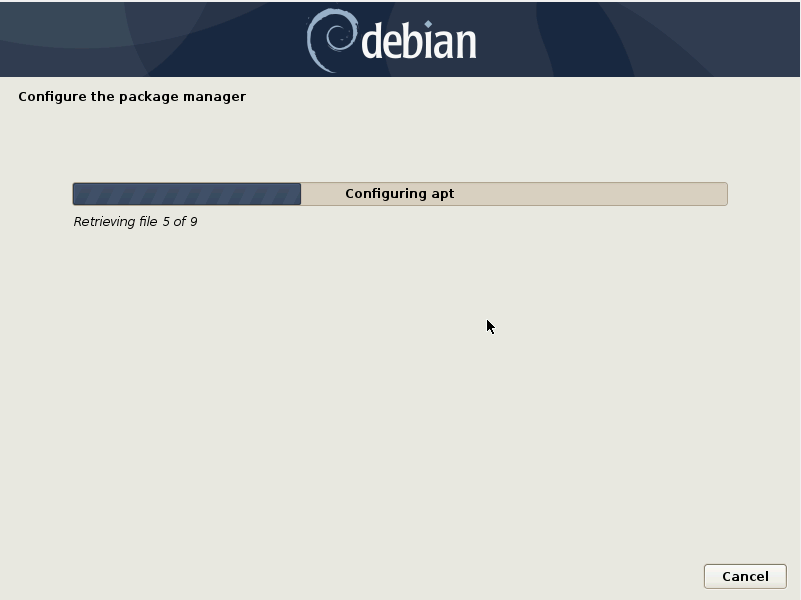
Debian 10 Buster will start configuring apt and will try to install the GRUB boot loader on your instance.
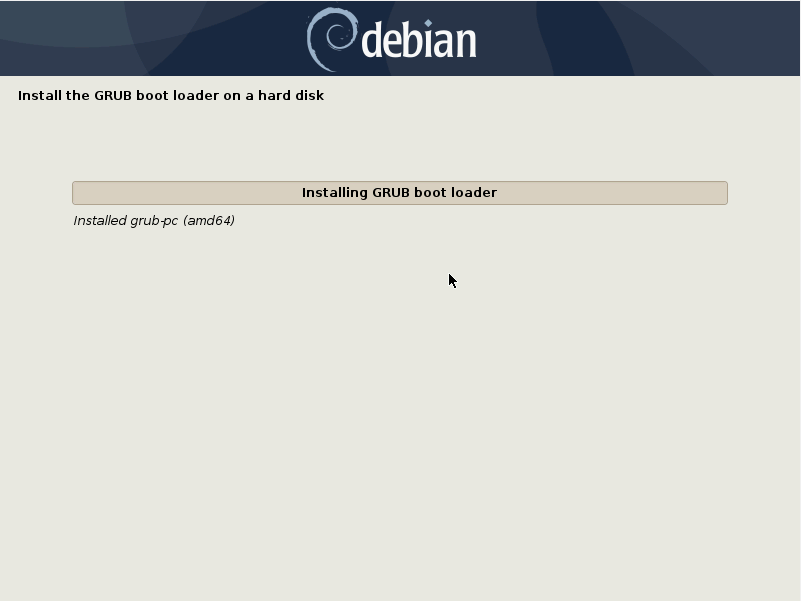
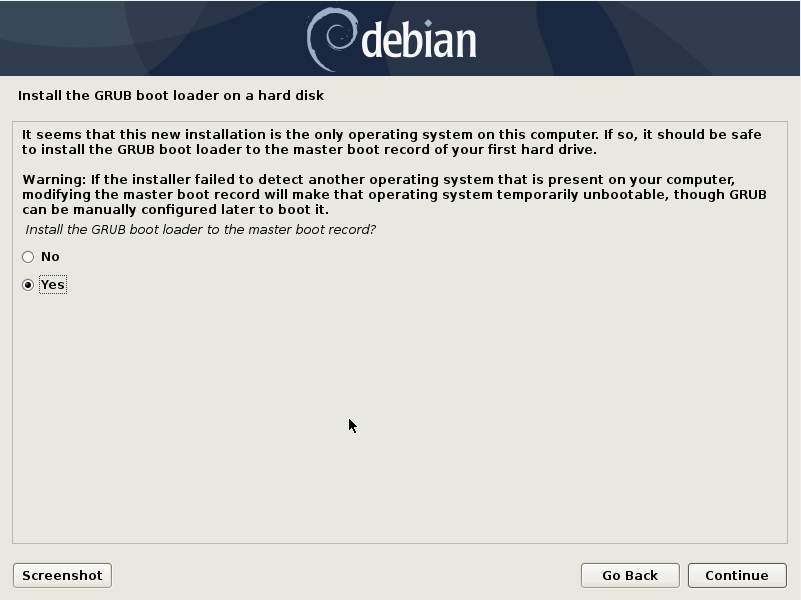
On the next step, you are asked if you want to GRUB boot loader to the master boot record, you obviously want to press “Yes” to that.
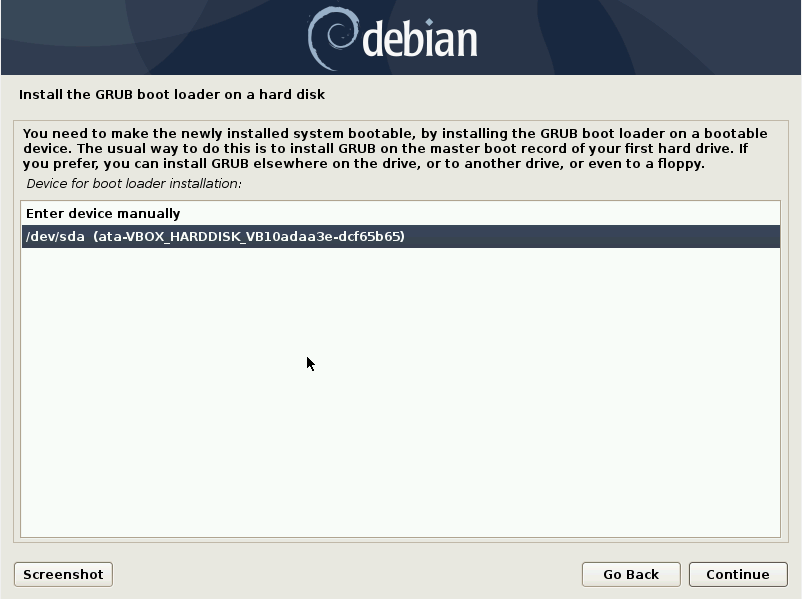
On the next screen, select the hard drive where you want the GRUB boot loader to be installed and press Continue.
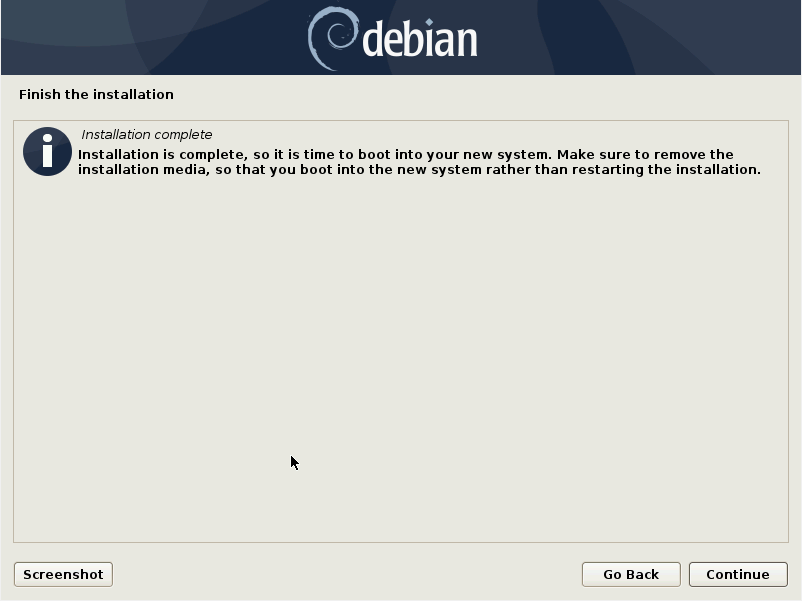
Done!
The installation should be completed at this point.
On the lock screen, type the password that you set up in the installation phase, and this is the screen that you should see.
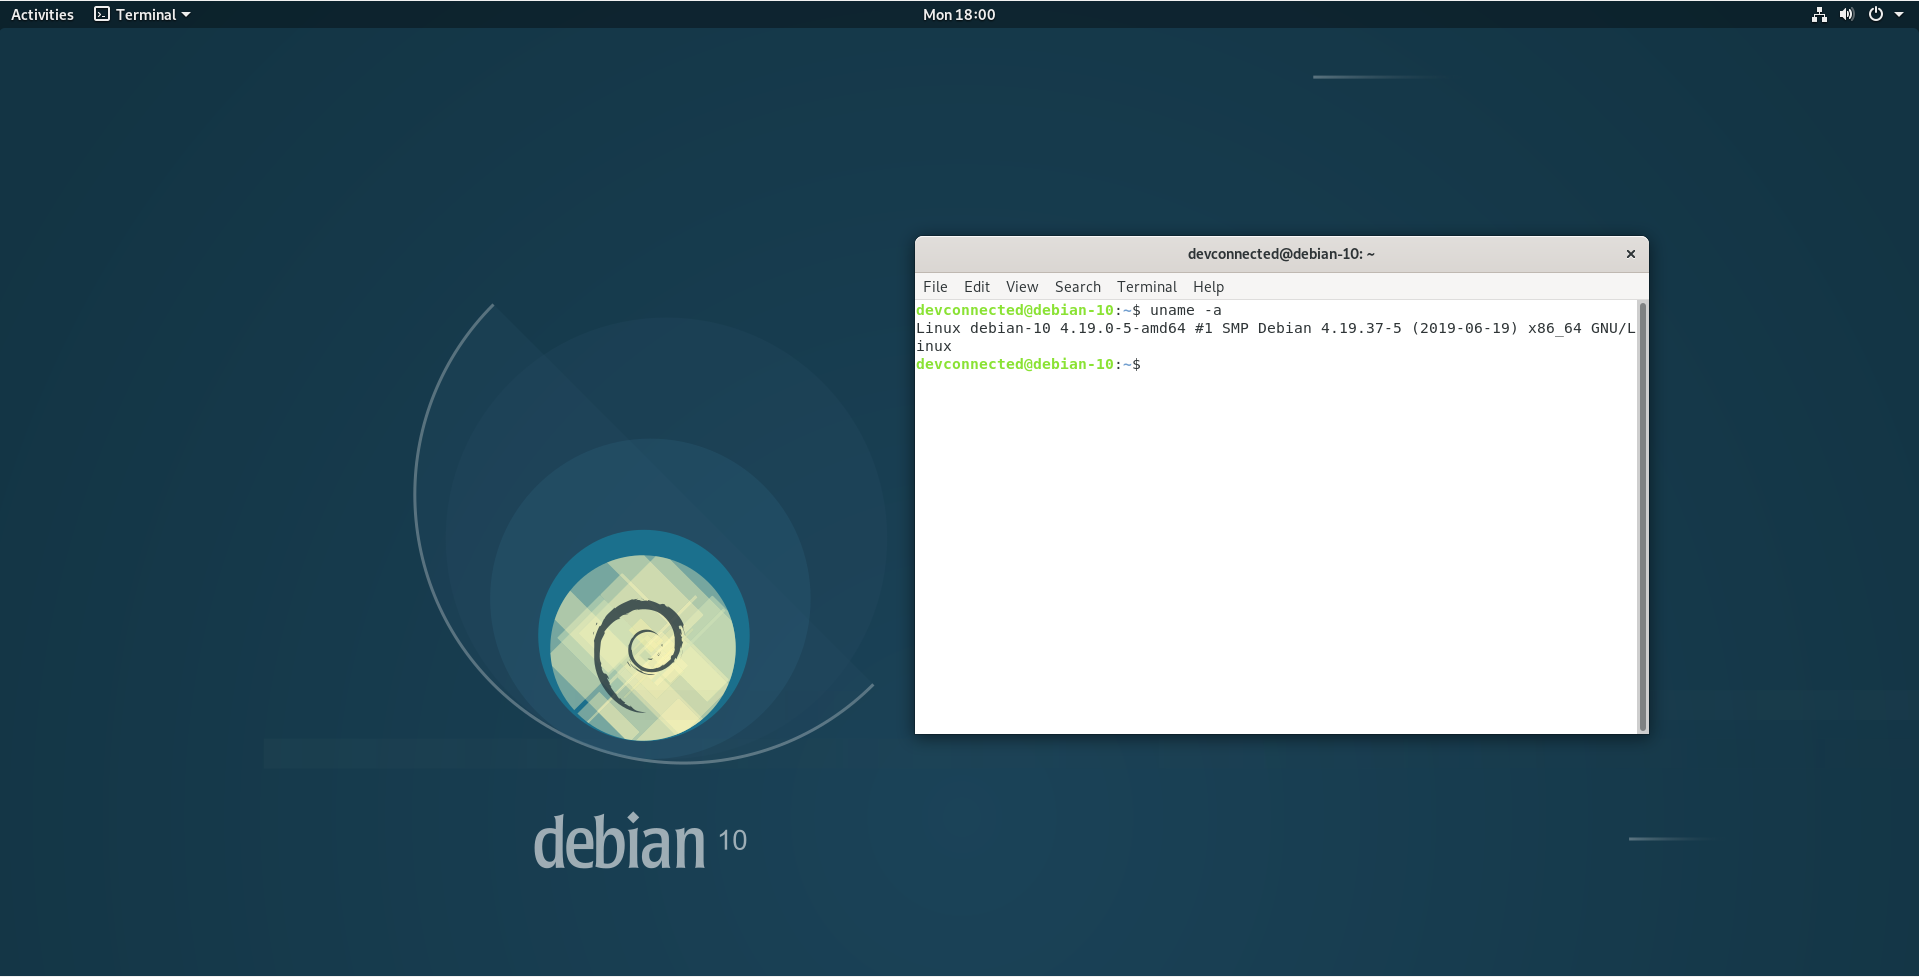
Awesome! You now have Debian 10 on your instance.
But this tutorial is not over. Before continuing, there are a few minimal configurations that you want to do on your Debian 10 buster instance for it to be all correctly configured.
III – Configure your Debian 10 Buster
Before playing with your new Debian 10 buster machine, there are a few steps that you need to complete.
a – Enable unofficial Debian software download
By default, downloading Debian software (like the tools that you would find in the Software store) are disabled by default.
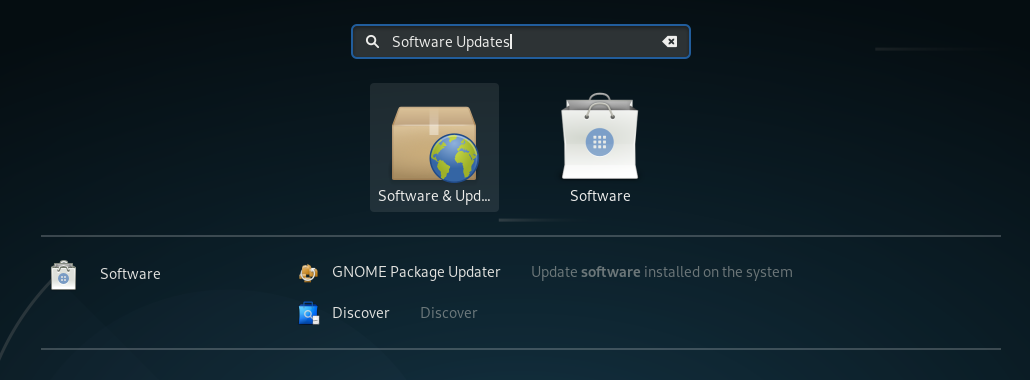
To enable them, head to “Activities”, and type “Software Updates”.
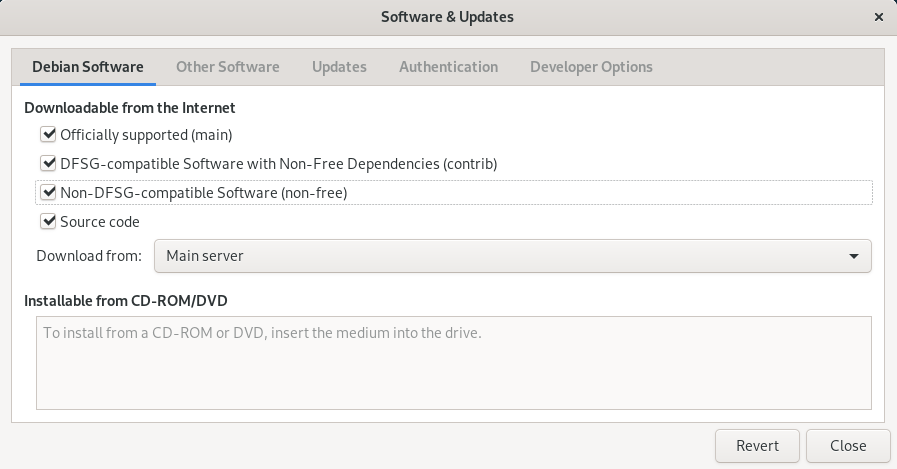
On the next window, the first and the last checkbox should be already checked.
Check the “DFSG-compatible Software with Non-Free Dependencies (contrib)” option and the “Non-DFSG-compatible Software (non-free)” option.
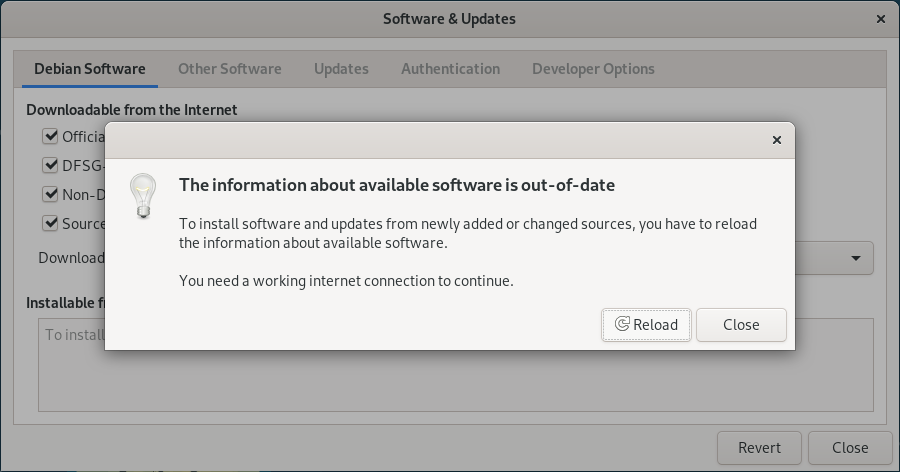
Click on “Close“. From there, you will be asked to confirm your choice by reloading the information about available software.
Simply click on “Reload“.
Head to the Store by typing “Store” into the Activities search box.
If you are seeing third-party applications, it means that the previous step worked correctly.
b – Install wget to download files from Internet
wget is not installed by default on your instance.
$ sudo apt install wget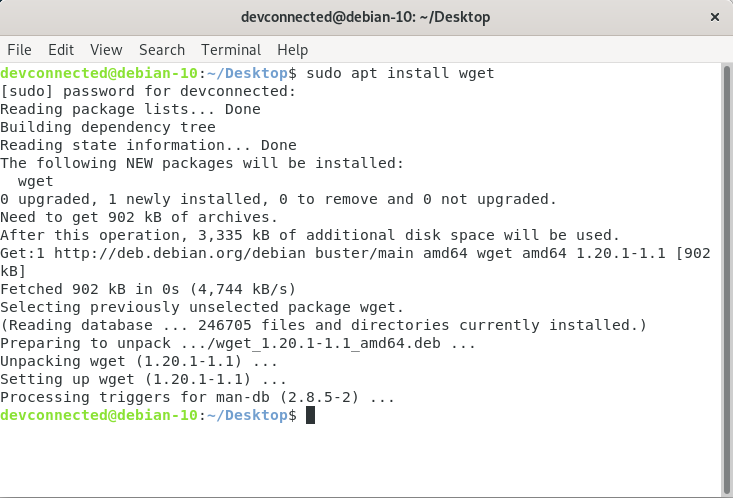
c – Install your NVIDIA drivers
The NVIDIA driver installation process is pretty straightforward.
Simply run the “nvidia-detect” command in your terminal and this utility will tell you which driver you have to install depending on your graphics card.
First, install nvidia-detect
$ sudo apt install nvidia-detect 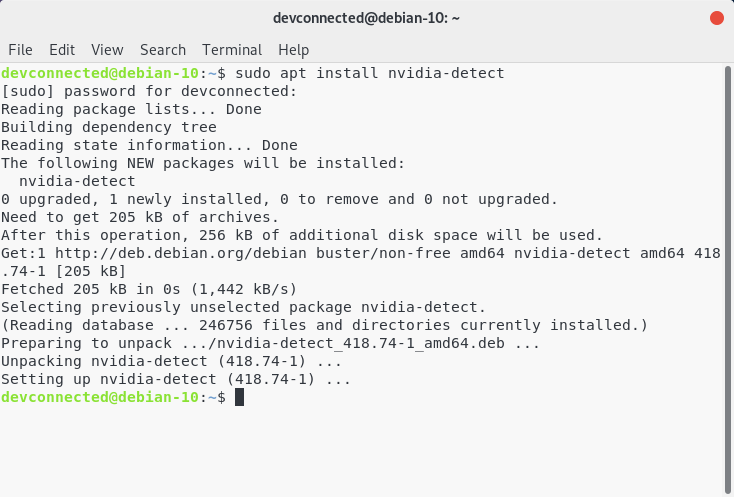
From there, run the nvidia-detect utility in your command line.
$ nvidia-detect
Detected NVIDIA GPUs:
02:00.0 VGA compatible controller [0300]: NVIDIA Corporation GF108 [GeForce GT 430] [10de:0de1] (rev a1)
Your card is supported by the default drivers.
It is recommended to install the
    nvidia-driver
package.
As you can see, the nvidia-detect utility states that I need to install the nvidia-driver package for my instance, so this is what I am going to do.
$ sudo apt install nvidia-driverd – Install Dash To Dock
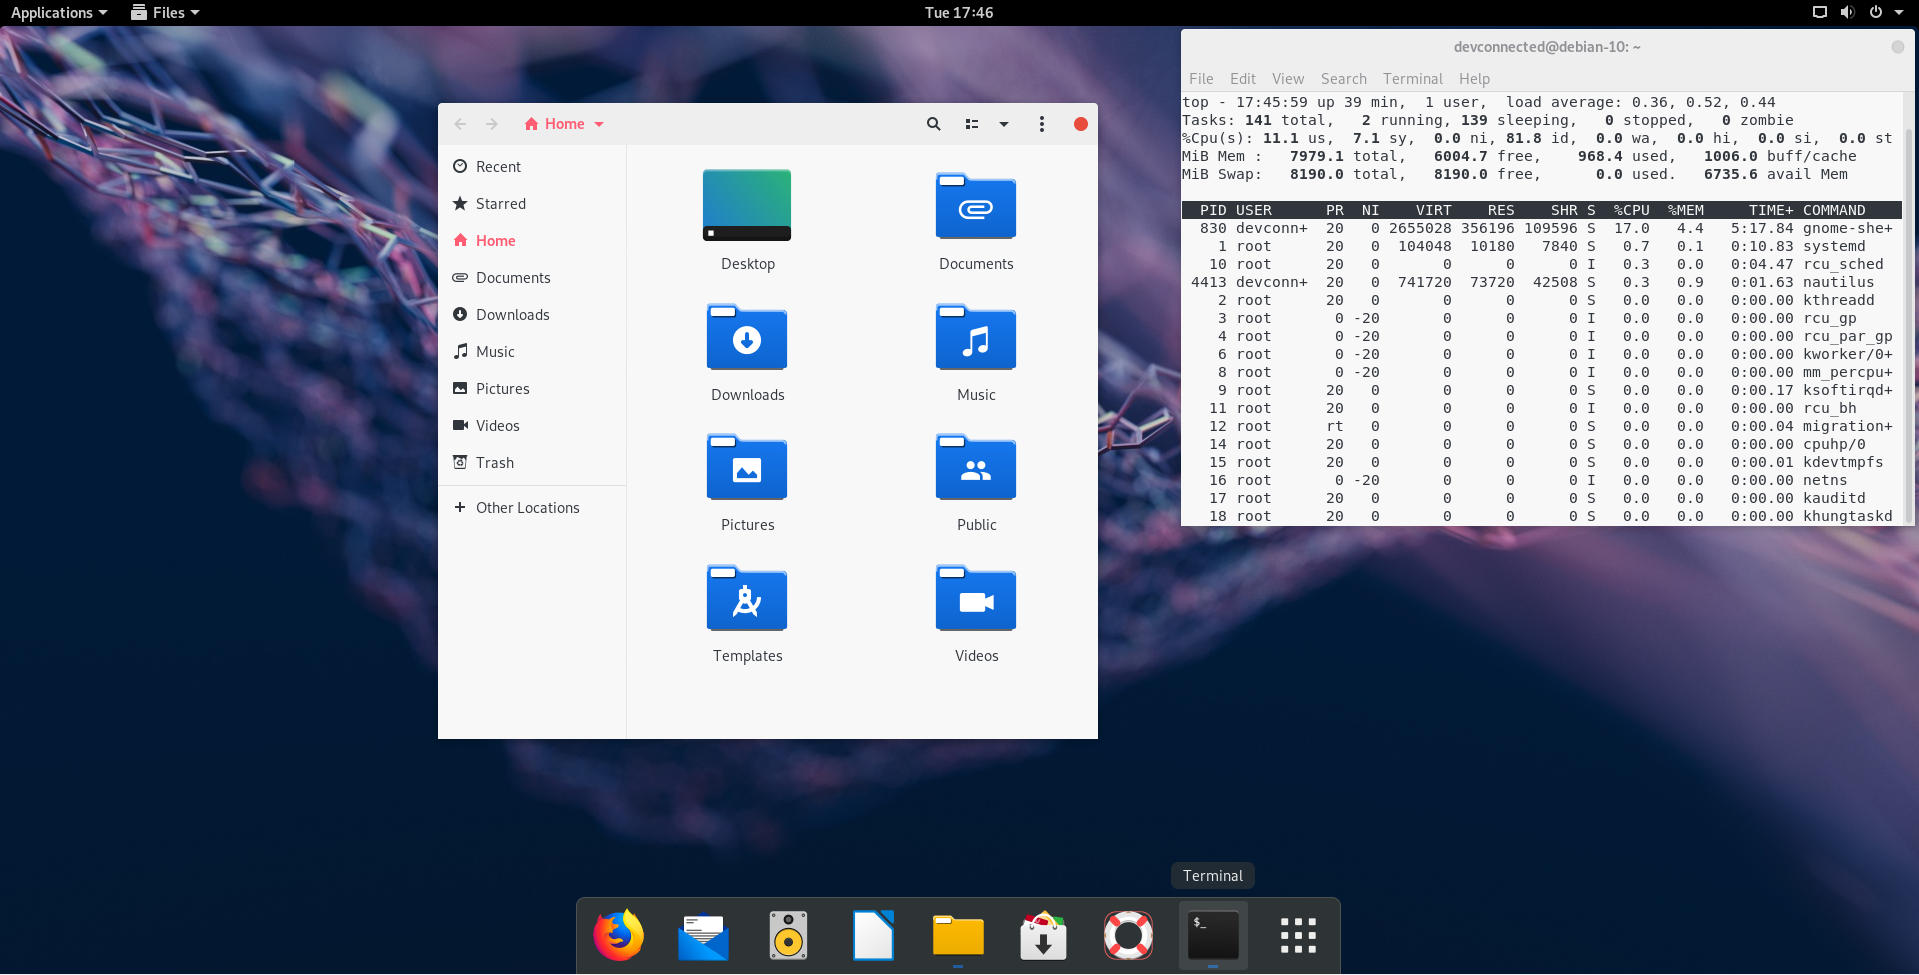
As a Debian user, I hate going to the top left Applications menu just to find my web browser or to browse my filesystem.
As a consequence, similarly to MacOS graphical interfaces, I would like a static application dock to be visible on my desktop, all the time.

To install it, head to the “Store” by typing “Store” in the Applications search box. This is the window that you should see.
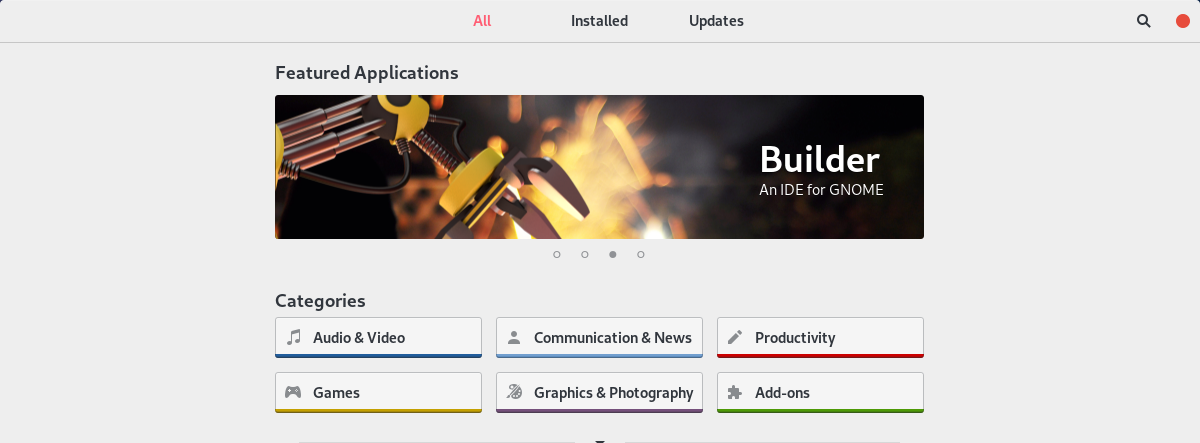
Click on “Add-ons”, and then select the “Shell Extensions tab“. You should see a list of shell extensions available for your Debian distribution.
In the top search bar, type “Dash To Dock“. Click on “Install” when you found the “Dash To Dock” store item.
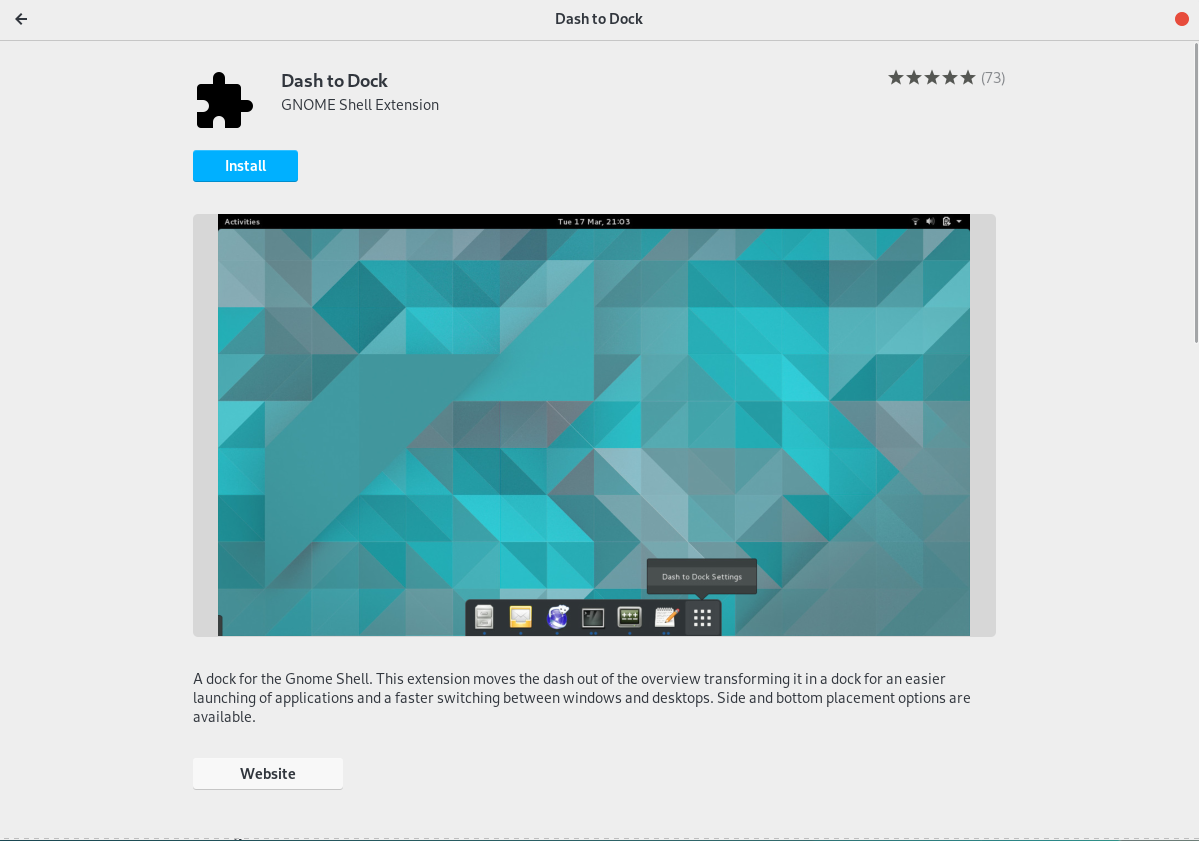
Simply click “Install” on the next window that is prompted on the screen.
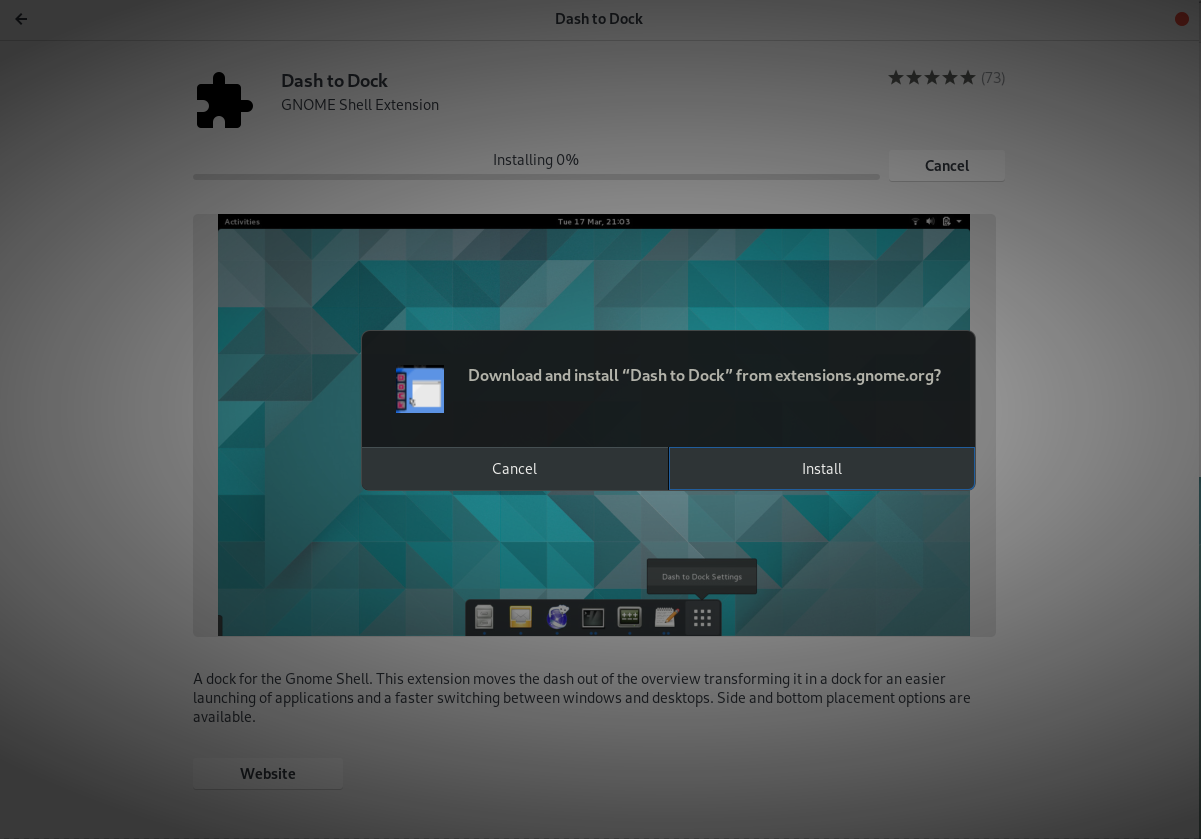
That’s it!
You now have a dash to dock on your desktop.
IV – Going Further
Your adventure with Debian 10 has only begun, but I would recommend that you start configuring your host if you plan on using it as a server.
Here’s a very good video of Linux Tex that explains all the things that you should do after installing your Debian 10 installation.
Some of the steps are already covered in this tutorial, but for the others, feel free to watch his video as it explains the procedures quite in details.
If you want to dig deeper into Linux, here are some of our recent tutorials on the subject.
- The Definitive Guide to Centralized Linux Logging with syslog.
- Monitoring Linux logs with rsyslog and Kibana
- Monitoring Linux processes using Prometheus and Grafana
They all work on Debian 10, so feel free to implement them.
Until then, have fun, as always.
11 comments
[…] How To Install and Configure Debian 10 Buster with GNOME […]
Be careful you are going to crush your data!
$ sudo dd if=/dev/sdb1 of=/home/antoine/debian-live-10.0.0-amd64-gnome.iso
should be
$ sudo dd if=/home/antoine/debian-live-10.0.0-amd64-gnome.iso of=/dev/sdb1
Many thanks for the catch! It is fixed in the article now.
if you copy on the first partition,
that USB key won’t boot.
Should be :
$ sudo dd if=/home/antoine/debian-live-10.0.0-amd64-gnome.iso of=/dev/sdb && sync
Thank you!
[…] In 2019 4 Best Time Series Databases To Watch in… How To Install Git On Debian 10 Buster How To Install and Configure Debian 10 Buster… How To Install Logstash on Ubuntu 18.04 and… How To Install InfluxDB 1.7 and 2.0 on… How […]
[…] InfluxDB 1.7… Linux File Permissions Complete Guide How To Install Git On Debian 10 Buster How To Install and Configure Debian 10 Buster… The Definitive Guide to Centralized Logging with Syslog… Home Linux System […]
[…] you run the initial Debian 10 installation, there is a high chance that some swap partition is already created on your […]
[…] commands will be executed in a Debian 10 environment with GNOME, but they will work for every […]
[…] by chance you disabled the root account in your Debian 10 installation, you can still configure your SSH server to refuse root login, in case you choose to re-enable your […]
[…] example, if you did not specify any password for root during the installation process, it might be locked by […]