
This post focuses on installing the latest version of Grafana v6.x on a CentOS 8 instance.
Grafana is by far one of the most popular open source dashboard monitoring tools of 2019.
Used by eBay, Paypal or RedHat, Grafana is definitely a must-have for engineers wanting a robust and scalable dashboard monitoring solution.
Grafana can be used to monitor a wide variety of different datasources.
You may choose to bind it to time series databases like InfluxDB or Prometheus, or to relationnal databases (MySQL or PostgreSQL)
If you are reading this tutorial, it is probably because you decided to bring Grafana into your infrastructure and start building awesome dashboards.
As a consequence, here are all the steps to install Grafana on CentOS 8:
Prerequisites
In order to install Grafana on CentOS 8, you will need to have sudo privileges on your host.
To make sure that this is the case, run the following command
$ sudo -l

User <user> may run the following commands on localhost:
   (ALL) ALL
If you have sudo privileges, you are good to go.
Install and update the newest packages available
Before installing any tools on your CentOS 8 host, you should first update your RPM packages with YUM.
This step is optional but you may required to do it in order to keep your system safe.
$ sudo yum updateThis step may take a couple of minutes if you haven’t updated your packages for a long time.
Add the Grafana repositories to your local YUM repos
In order to be able to install Grafana with YUM, you need to add the official Grafana repositories to your local YUM allowed repositories.
Create a new file named “grafana.repo”, and paste the following content in it.
$ sudo vi /etc/yum.repos.d/grafana.repo

[grafana]
name=grafana
baseurl=https://packages.grafana.com/oss/rpm
repo_gpgcheck=1
enabled=1
gpgcheck=1
gpgkey=https://packages.grafana.com/gpg.key
sslverify=1
sslcacert=/etc/pki/tls/certs/ca-bundle.crt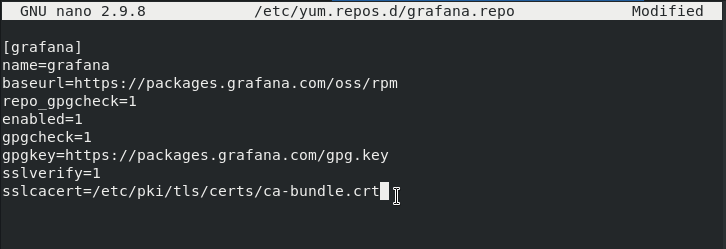
Save your file and update your repositories one more time.
$ sudo yum update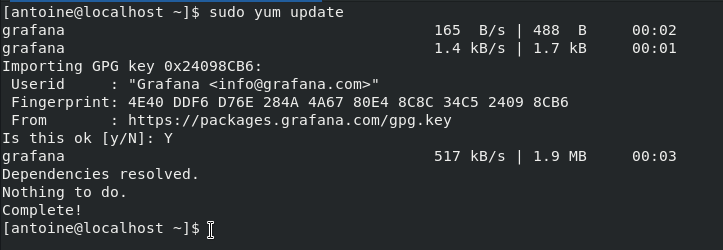
Install Grafana with YUM
Now that your repositories are linked to Grafana official repositories, you are ready to install the latest version of Grafana on CentOS 8.
To install Grafana with YUM, run the following command
$ sudo yum install grafana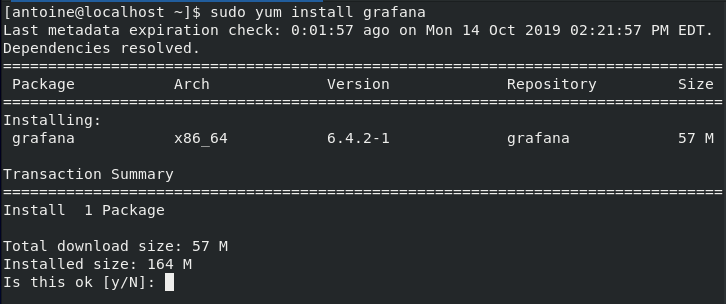
Make sure to press “y” when you are asked if you really want to install Grafana.
You will also be asked if you want to import the GPG key from Grafana, hit “y” to proceed with the installation.

Inspect your grafana-service systemd service
By default, Grafana created a systemd service for you.
First, you are going to make sure that the service was created, but you are also going to use it as a way to determine where files and folders are located on your host.
You will for example be given the data folder (where dashboards are stored) or the log folders in order to inspect your logs.
To inspect your Grafana service, run the following command
$ cat /usr/lib/systemd/system/grafana-server.service

[Unit]
Description=Grafana instance
Documentation=http://docs.grafana.org
Wants=network-online.target
After=network-online.target
After=postgresql.service mariadb.service mysql.service

[Service]
EnvironmentFile=/etc/sysconfig/grafana-server
User=grafana
Group=grafana
Type=notify
Restart=on-failure
WorkingDirectory=/usr/share/grafana
RuntimeDirectory=grafana
RuntimeDirectoryMode=0750
ExecStart=/usr/sbin/grafana-server                                                  \
                            --config=${CONF_FILE}                                   \
                            --pidfile=${PID_FILE_DIR}/grafana-server.pid            \
                            --packaging=deb                                         \
                            cfg:default.paths.logs=${LOG_DIR}                       \
                            cfg:default.paths.data=${DATA_DIR}                      \
                            cfg:default.paths.plugins=${PLUGINS_DIR}                \
                            cfg:default.paths.provisioning=${PROVISIONING_CFG_DIR}


LimitNOFILE=10000
TimeoutStopSec=20
UMask=0027
[Install]
WantedBy=multi-user.target
This file is very important because it gives you much more information about your Grafana instance.
As you can see from this file :
- The Grafana server binary is located at /usr/sbin/grafana-server.
- The file that defines all the environment variables is located at /etc/sysconfig/grafana-server
- The configuration file is given via the CONF_FILE environment variable.
- The PID of the file is also determined by the PID_FILE_DIR environment variable.
- Logging, data, plugins and provisioning paths are given by environment variables.
Here’s the content of the environment variable file (etc/sysconfig/grafana-server)
GRAFANA_USER=grafana

GRAFANA_GROUP=grafana

GRAFANA_HOME=/usr/share/grafana

LOG_DIR=/var/log/grafana

DATA_DIR=/var/lib/grafana

MAX_OPEN_FILES=10000

CONF_DIR=/etc/grafana

CONF_FILE=/etc/grafana/grafana.ini

RESTART_ON_UPGRADE=true

PLUGINS_DIR=/var/lib/grafana/plugins

PROVISIONING_CFG_DIR=/etc/grafana/provisioning

# Only used on systemd systems
PID_FILE_DIR=/var/run/grafana
Also, a Grafana user and group were created for your on your instance.
Those credentials will be used in order to access and modify some of the files related to Grafana your CentOS 8.
Start your grafana-server service
Now that everything is ready, you can start your Grafana server.
To start your Grafana server, simply run the following command
$ sudo systemctl start grafana-server
$ sudo systemctl status grafana-server
● grafana-server.service - Grafana instance
   Loaded: loaded (/usr/lib/systemd/system/grafana-server.service; disabled; vendor preset: enab
   Active: active (running) since Sat 2019-06-08 16:01:56 UTC; 3 weeks 0 days ago
     Docs: http://docs.grafana.org
 Main PID: 10164 (grafana-server)
    Tasks: 10 (limit: 4704)
   CGroup: /system.slice/grafana-server.service
           └─10164 /usr/sbin/grafana-server --config=/etc/grafana/grafana.ini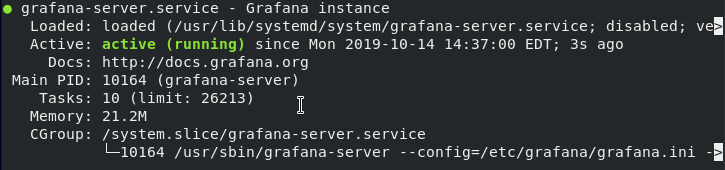
Is your service set as “Active” too?
Great!
Your Grafana server is now up and running on CentOS 8.
In the next sections, we are going to see how you can start tweaking your Grafana configuration in order for it to be safe and robust.
Changing your firewall rules
Before configuring your Grafana server, you are going to open the port 3000 via TCP on your server.
Grafana uses the port 3000 for Web Administration, as a consequence, the web interface may be inaccessible if you don’t open this port.
To open the port 3000 on CentOS 8, run this command
$ sudo firewall-cmd --add-port=3000/tcp --permanent
success
$ sudo firewall-cmd --reload
success
Make sure that everything is correctly set.
$ sudo firewall-cmd --list-all | grep ports
ports: 3000/tcpAwesome!
Let’s start configuring our Grafana server by doing the first login.
Launch Grafana v6 Web UI
Now that everything is configured properly, you should be able to have a look at the Grafana v6 Web UI.
To open the Grafana Web UI, navigate to http://localhost:3000 with your web browser.
As a reminder, here are all the defaults for Grafana:
The default port for Grafana is 3000.
You will be presented with this screen when launching the application for the first time.
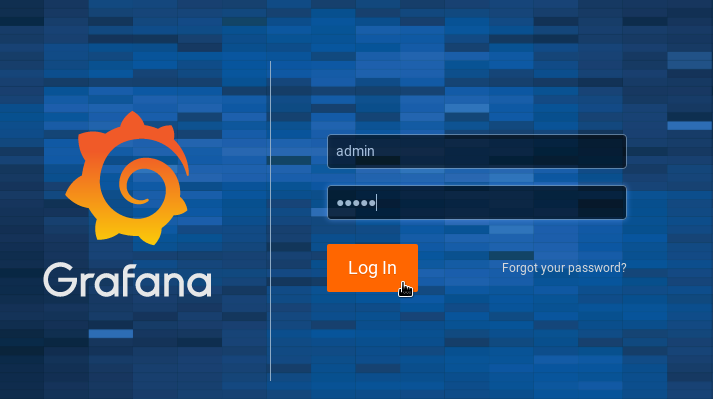
The default login for Grafana is ‘admin’ and the default password is also ‘admin’.
When setting those credentials, you will be asked to change your password.
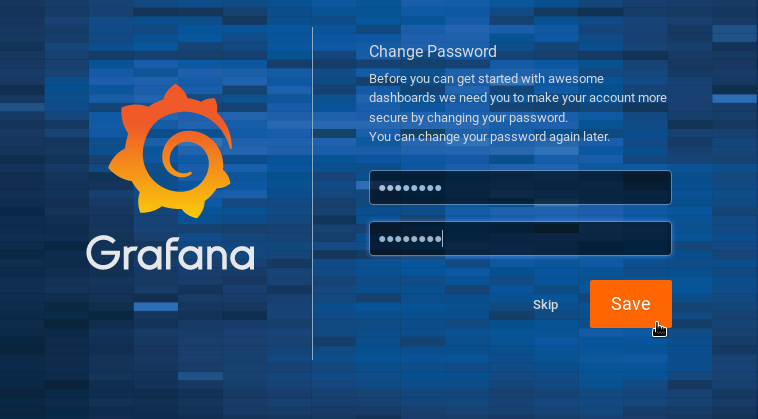
Choose a password, and click on ‘Save‘.
You should now see the default screen for Grafana v6.4.

Disable new user registrations
The account that you created when you first launched your server will be used as an administrator account for your server.
However, in order to prevent unallowed access, you may want to disable user registration.
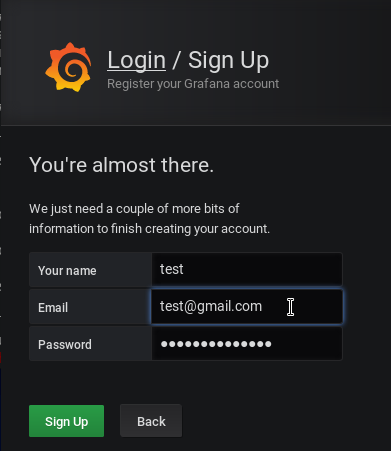
Natively, user registration is available at http://localhost:3000/signup
To disable user registration, head back to your configuration file, and disable the following section.
$ sudo vi /etc/grafana/grafana.ini
(in Vi) ?[users]

[users]
# disable user signup / registration
;allow_sign_up = true

# Allow non admin users to create organizations
;allow_org_create = true

# Set to true to automatically assign new users to the default organization (id 1)
;auto_assign_org = true
Change the allow_sign_up setting to false, and restart your Grafana server.
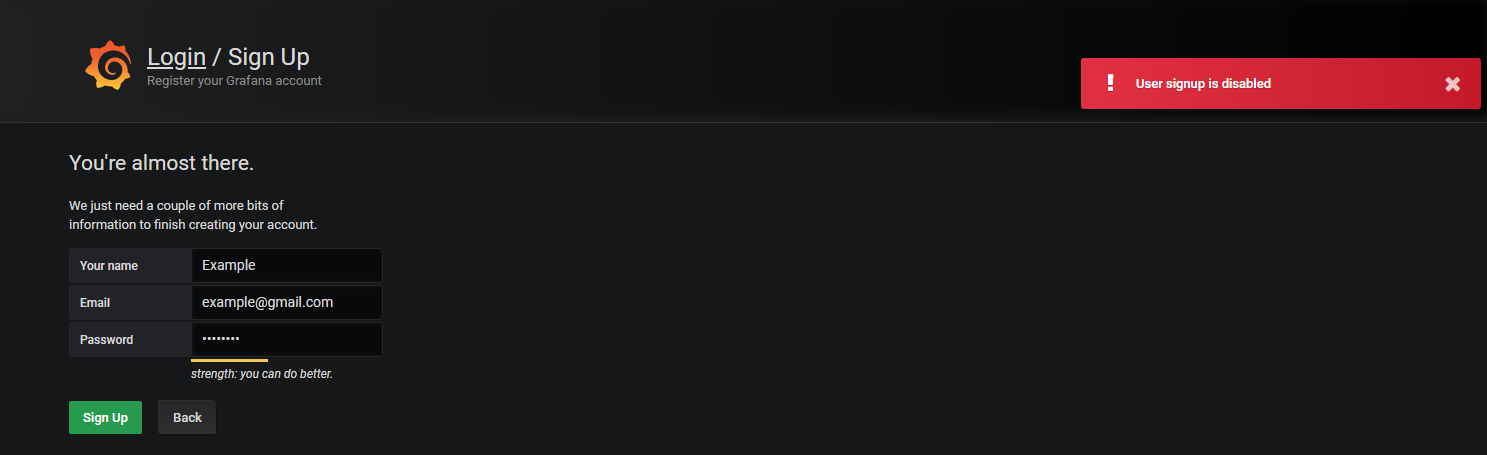
;allow_sign_up = false

$ sudo systemctl restart grafana-server
Now that user registration is disabled, head over to http://localhost:3000/signup and try to create an account.
Creating your first dashboard
Creating a dashboard in Grafana is very easy and you can do it using two different ways : by the UI or using the Grafana API.
We already wrote a tutorial on how to create a Grafana dashboard, so make sure to read it in order your own dashboards.
Start monitoring targets with Grafana
Grafana alone isn’t very useful, you will have to install it along with other tools such as InfluxDB or Prometheus to start gathering data.
As a reminder, Grafana binds to time series databases, or relational databases such as MySQL in order to query data from those datasources.
If you are looking to start monitoring your Linux host performance, you can start with this tutorial explaining how you can achieve it with Prometheus.
On the other hand, you can choose to have the TIG stack installed (Telegraf, InfluxDB and Grafana) in order to bind Telegraf to a wide variety of different targets.
To install the TIG stack on Linux, you can follow this tutorial.
If you are interested in Linux System Administration, we have a complete section dedicated to it on the website.

1 comment
[…] […]