
This tutorial details all the steps to create a database on InfluxDB 1.7.x and 2.x.
Created on 2013 by InfluxData, InfluxDB is probably one of the most popular time series databases available.
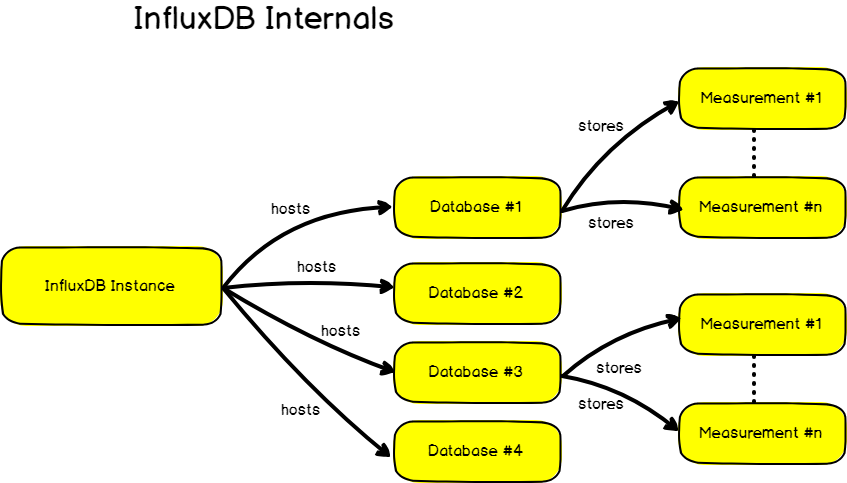
Popular for its very high ingestion rate, InfluxDB stores millions of data points in structures called databases.
In those databases, data are arranged by measurements and indexed later on by the popular TSI, standing for Time Series Index.
In today’s tutorial, we are going to see the different ways to create a database on InfluxDB.
This tutorial covers both InfluxDB 1.7.x and InfluxDB 2.x versions as the two versions are currently co-existing for now.

Here is how to create a database on InfluxDB.
I – Creating an InfluxDB Database using the CLI
The first way and easiest way to create an InfluxDB database is through the InfluxDB CLI.
a – Launch the InfluxDB CLI
On InfluxDB 1.7.x, simply launch the influx binary.
$ influx
Connected to http://localhost:8086 version 1.7.7
InfluxDB shell version: 1.7.7
b – Verify that you have admin rights on the InfluxDB server
This step only applies if you have enabled the authentication on your InfluxDB server.
It means that you connected to the InfluxDB CLI by specifying your username and password.
To verify that you have admin rights on InfluxDB, issue the following command.
$ SHOW USERS
user    admin
----    -----
admin   true
If you are not admin, ask your system administrator to grant you the permissions.
c – Create your InfluxDB database
The “CREATE DATABASE” command takes multiple arguments. Here is the syntax.
CREATE DATABASE <database_name> [WITH [DURATION <duration>] [REPLICATION <n>] [SHARD DURATION <duration>] [NAME <retention-policy-name>]]The database name is a mandatory parameter, but all of the other parameters are optional.
By default, InfluxDB uses a default retention policy called autogen.
Autogen keeps data forever (infinite retention policy) and the default shard duration is 168h, or 7 days.

Knowing that, here is a description of the different parameters used in the “CREATE DATABASE” command:
- DURATION: sets the duration value of the “autogen” retention policy for the current database.
$ CREATE DATABASE "example" WITH DURATION 1h
- REPLICATION: in case you are using an InfluxDB cluster, your databases will probably be replicated among multiple different shards. The default is set to 1, but feel free to tweak this parameter if you are working with multiple different instances of InfluxDB.
- SHARD DURATION: defines the minimum duration until your InfluxDB server starts collecting data is a new shard. It is quite important to correctly setup this parameter if you are working with your own custom retention policies.
- NAME: the name of your database

II – Create an InfluxDB database using the InfluxDB API
Alternatively, there is another way to create an InfluxDB database which is by sending a HTTP request to the InfluxDB REST API.
a – Using cURL
If you don’t have cURL already, make sure to install it first.
$ sudo apt-get install curl
$ curl --help
Make sure that the HTTP API is enabled in the InfluxDB configuration file.
$ sudo vi /etc/influxdb/influxdb.conf

[http]
  # Determines whether HTTP endpoint is enabled.
  enabled = true

  # The bind address used by the HTTP service.
  bind-address = ":8086"
Restart your InfluxDB server is necessary, and create your database via the /query endpoint.
$ sudo systemctl restart influxdb
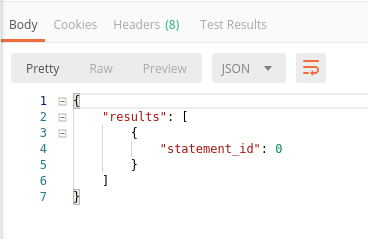
$ curl -XPOST 'http://localhost:8086/query' --data-urlencode 'q=CREATE DATABASE "devconnected"'
{"results":[{"statement_id":0}]}If you are using authentication, you need to specify the user password combination.
$ curl --user admin:password -XPOST 'http://localhost:8086/query' --data-urlencode 'q=CREATE DATABASE "devconnected"'

{"results":[{"statement_id":0}]}
If you are using InfluxDB with HTTPS on self-signed certificates, you need the cURL -k option for unsafe checks.
$ curl --user admin:password -k -XPOST 'http://localhost:8086/query' --data-urlencode 'q=CREATE DATABASE "devconnected"'

{"results":[{"statement_id":0}]}
Verify that your database is correctly created via the InfluxDB CLI.
$ influx
Connected to http://localhost:8086 version 1.7.7
InfluxDB shell version: 1.7.7

> SHOW DATABASES
name: databases
name
----
_internal
devconnected
Great! You have successfully created a database on InfluxDB!
If you prefer to use Postman, here’s how to do it.
b – Using Postman
For this tutorial, let’s assume that you already have Postman installed on your computer.
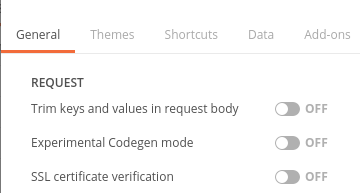
First, unblock the “SSL Certificate Verification” option on Postman.
Head over to Settings > General, and uncheck the SSL verification option.
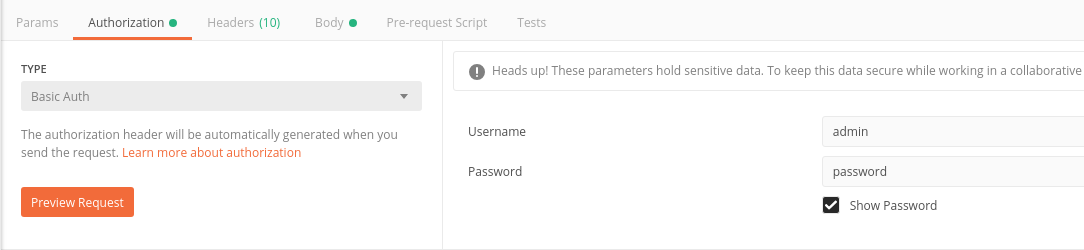
Create a POST request to the /query endpoint.
In the body panel, select the “x-www-form-urlencoded” option, and put the following values.

In the Authorization panel, select a “Basic Auth” option, and fill the following fields with the correct credentials.
Click on “Send” and verify that you are getting the correct HTTP response.
Check again on the InfluxDB server that the database was correctly created.
$ influx
Connected to http://localhost:8086 version 1.7.7
InfluxDB shell version: 1.7.7

> SHOW DATABASES
name: databases
name
----
_internal
devconnected
postman
Great!
You have successfully created an InfluxDB database from Postman.
III – Create a Database using InfluxDB clients
In order to interact with the InfluxDB HTTP API, developers have created multiple clients in different languages: Java, Javascript, Go, .NET, Perl and many others.
Using those clients is another way to create an InfluxDB database (if the developers exposed a method for it of course)
a – Creating a database in Java
As an example, the influxdb-java library allows you to create an InfluxDB database very easily.
In your Java project, import the influxdb-java package in your pom file.
<dependency>
    <groupId>org.influxdb</groupId>
    <artifactId>influxdb-java</artifactId>
    <version>2.15</version>
</dependency>
Next, connect to your InfluxDB instance, and create a database.
InfluxDB influxDB = InfluxDBFactory.connect("http://localhost:8086", "admin", "password");

influxDB.createDatabase("java-database");
influxDB.createRetentionPolicy(
  "one-year", "java-database", "365d", 1, true);
Again, make sure that your database was created successfully using the InfluxDB CLI.
$ influx
Connected to http://localhost:8086 version 1.7.7
InfluxDB shell version: 1.7.7

> SHOW DATABASES
name: databases
name
----
_internal
java-database
Awesome, you created an InfluxDB database using a Java client library.
b – Create a database in Javascript / NodeJS
As a second example, let’s see how you can create an InfluxDB database using Javascript and the Node runtime.
For this, we are going to use the node-influx library available on Github (developed by Ben Evans and Connor Peet)
First, install the node module to your project.
$ npm install --save influxDatabase creation is done by using the createDatabase method available in the API.
const Influx = require('influx');
const influx = new Influx.InfluxDB({
  host: 'localhost',
  port: 8086,
  username: 'admin',
  password: 'password'
})

// Create an InfluxDB database
influx.createDatabase('node-database')
Did you know?
This is the library that I used to design Stream Highlights, a real time highlights detection platform for Twitch.
Finally, make sure that your database was successfully created.
$ influx
Connected to http://localhost:8086 version 1.7.7
InfluxDB shell version: 1.7.7

> SHOW DATABASES
name: databases
name
----
_internal
node-database
IV – Create a database with the InfluxDB 2.0 CLI
At the beginning of the year, InfluxDB 2.0 was announced in alpha and the product is now actively developed.
Instead of having four different tools, also known as the TICK (Telegraf, InfluxDB, Chronograf, Kapacitor) stack, InfluxDB 2.0 will be one single platform for you to perform all your tasks.
In InfluxDB 2.0, databases no longer exist, they are replaced by buckets.
Conceptually, buckets are pretty much like databases, but we will need different commands to create them.
a – Get a secure token
If you try to execute a command with the Influx CLI without being authorized, you will get the following message.

On InfluxDB 2.0, you have to specify a token when performing a request.
Head over to your InfluxDB 2.0 platform located at http://localhost:9999 by default.
Click on “Settings“
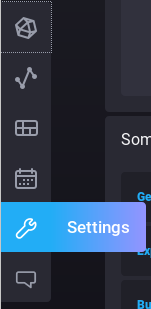
Then click on the “Tokens” option.
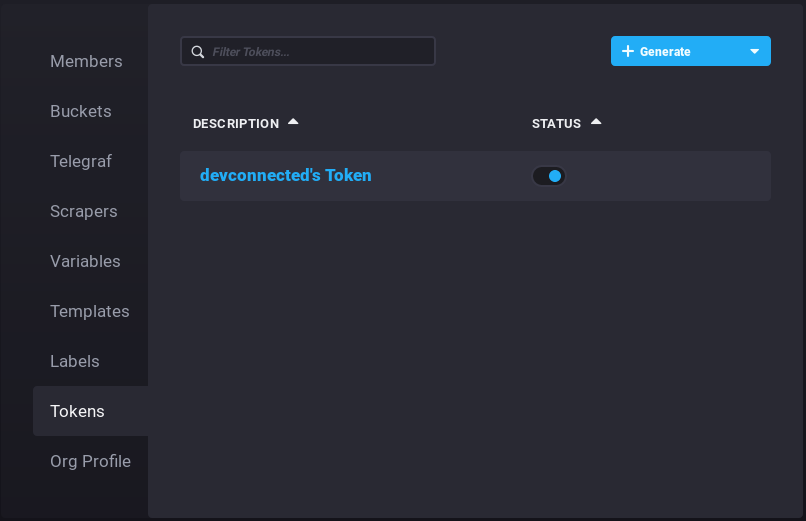
If a token already exists, simply click on it, and copy the token shown in the popup window.

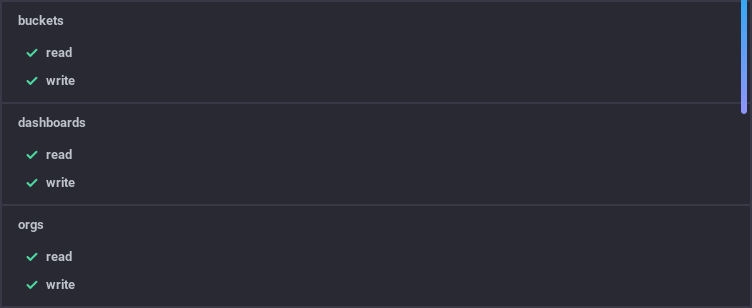
Make sure that your token has at least the “read” permission for the “orgs” section, and the “write” for the “buckets” section.
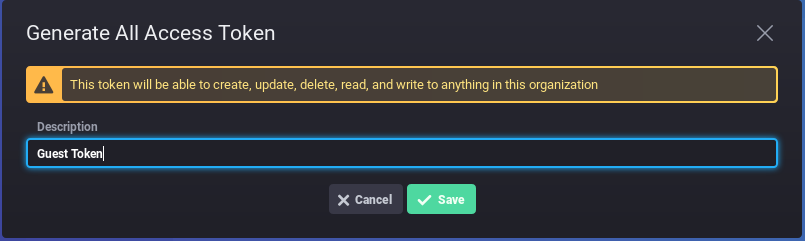
If your token doesn’t exist already, you can generate one by clicking on the “Generate” option located at the top-right corner of the window.
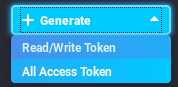
Click on “All Access Token”, give a name to your token, and you are ready to go!
b – Get your organization ID
In order to create a bucket, you will need your organization ID.
To find your organization ID, execute the following command.
$ influx org find -t yoursecrettoken
ID                     Name
044dc0bcf1860000       devconnected
c – Create your bucket
Now that your have your organization ID, you can create your bucket.
Here’s the command :
$ influx bucket create -n bucketname --org-id 044dc0bcf1860000 -r 10h -t yoursecrettokenIn this command, multiple flags are specified:
- -n : the name of the bucket
- –org-id : the organization ID (that you previously grabbed)
- -r : the bucket retention time in nanoseconds
- -t : the secret token

Make sure that your bucket was correctly created with the following command.
$ influx bucket find -t yoursecrettokenV – Create a database using the InfluxDB 2.0 UI
If you prefer clicking buttons than running commands in a terminal, this method is for you.
Click on “Settings” > “Bucket”
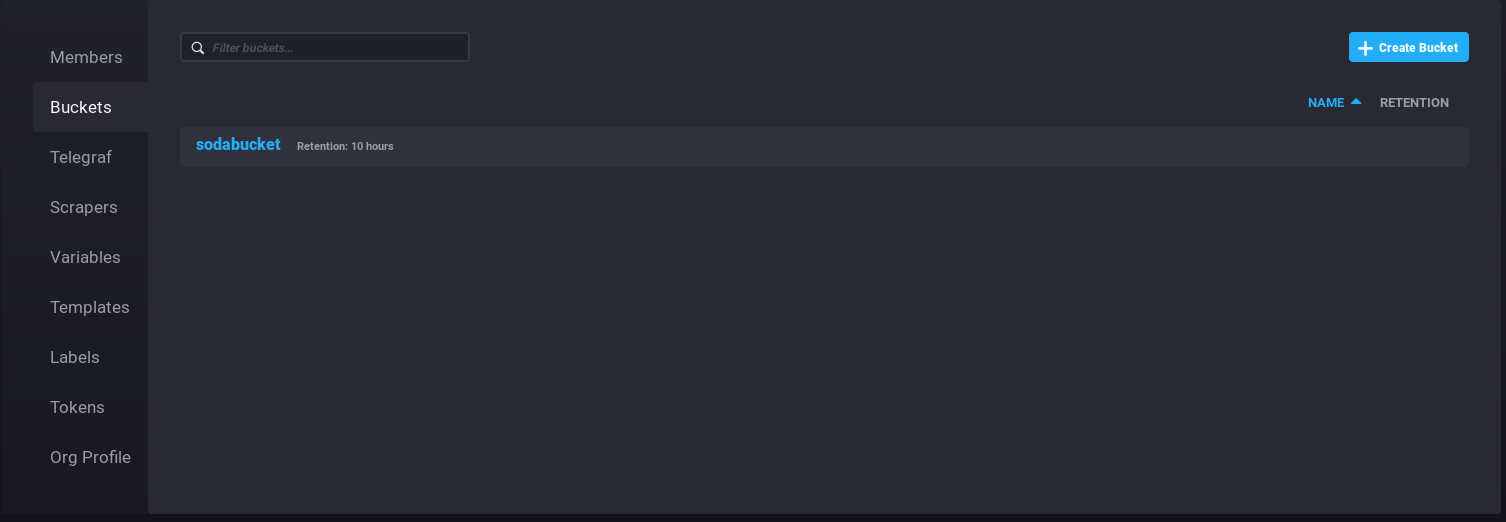
Click on the “Create bucket” option at the top-right corner of the window.
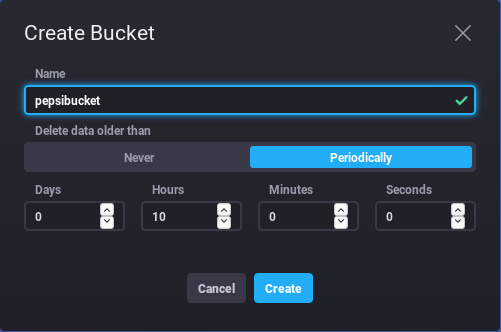
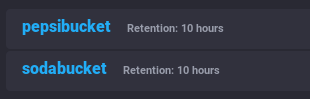
Give a name to your bucket, and define a retention policy for it. I chose 10 hours in the previous example.
Simply click on “Create” to end the creation process.
Awesome, your bucket has been created!
VI – Conclusion
In this tutorial, we detailed all the different ways to create an InfluxDB database or bucket depending on the version that you are using.
It you need more details about InfluxDB, make sure to read the definitive guide to InfluxDB.
Concepts detailed are for InfluxDB 1.7.x, but most of them still apply if you are using InfluxDB 2.0.
If you need more practical tutorials, here’s how you can monitor SSH hackers on a Linux server using InfluxDB.
Until then, have fun, as always.
3 comments
[…] How To Create a Database on InfluxDB 1.7 & 2.0 […]
Trying to create database with CURL throws an error: {“results”:[{“statement_id”:0,”error”:”not implemented: CREATE DATABASE”}]}
Thank you, man. You saved lots of searching times for me.